This is an early preview of Movie Maker: a tool for choreographing cutscenes, scheduling moving objects in the world, and editing in-engine trailers.
Reporting Bugs / Giving Feedback
Please create issues in this repository, mentioning Movie Maker in the title.
Getting Started
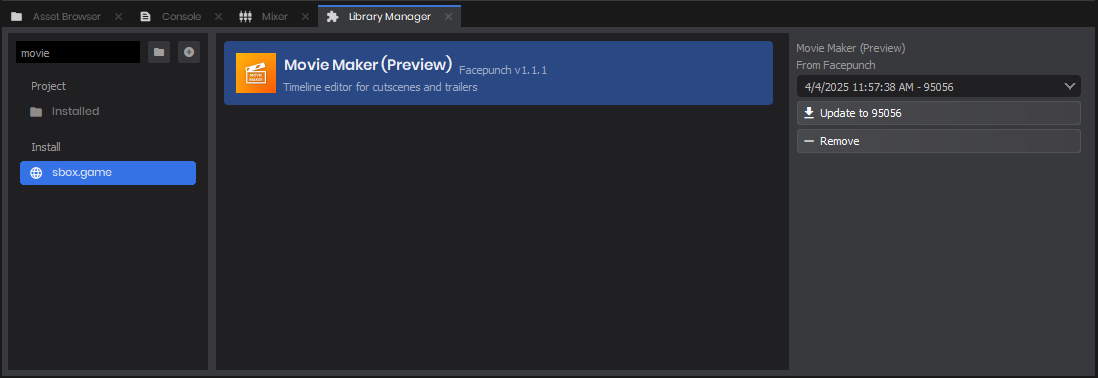
Install Movie Maker from the library manager in the editor. This is also where you can update Movie Maker in the future as it gets new features and fixes.Now you should be able to find Movie Maker in the View menu. Open it up, and optionally dock it somewhere in the editor.
Movie Player Component
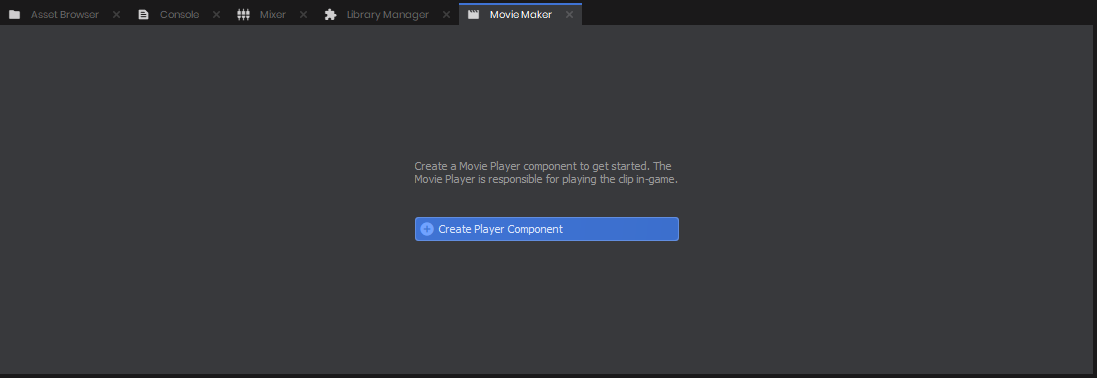
Movies are played back using a Movie Player component. It's responsible for mapping tracks in a movie clip to GameObjects, Components, and properties in the scene.
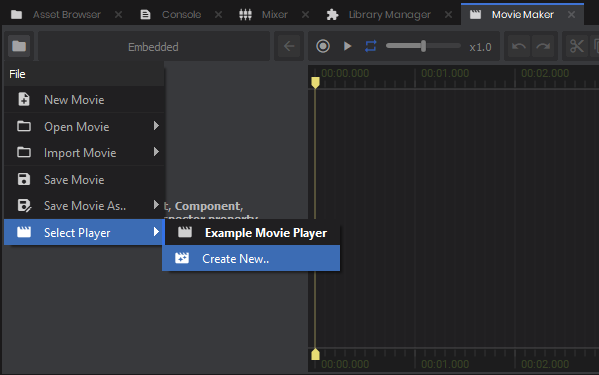
If your scene doesn't have a Movie Player, you can create one using the big button on the Movie Maker startup screen.You can also create new players through the File menu of Movie Maker.
Movie Projects
Movie projects can either be embedded in a Movie Player, or saved in a Movie Resource asset.
Embedded movies are saved in the containing scene or prefab, and are for simple one-off movies
Movie Resources can be re-used my multiple players, and can be switched between during gameplay
Tracks
Movie projects are made up of a list of tracks, which describe how elements of the scene change over time.
Create tracks by dragging GameObjects from the hierarchy, Components or properties from the inspector, or other Movie Resources from the asset browser.Tracks are nested under whatever Component or GameObject they belong to. You can collapse or lock tracks using the buttons in the track list, or right-click on a track to see more options.
Time Envelope Selection
When editing, you select a region of time that you want to affect. This selection can have an optional fade in and / or fade out.
Click and drag in the timeline to select a time region. You can then manipulate it by dragging its various elements, or holding shift and scrolling to increase or decrease its fade duration.When a region of time is selected, you can then manipulate objects in the scene to create a new modification. The selection will turn orange, showing that we have pending changes. You can keep manipulating the scene and changing the time selection, then when you're happy hit the Enter key or press the green Apply button to commit the change to the project. You can also hit Escape or the red Cancel button to revert your changes to the movie.
Previewing Changes
While editing, you can hold shift and mouse over the timeline to preview how the edit will look. You can also press the Toggle Play button to preview playing the whole movie.
Live Recording
You can record live changes to tracks, both in editor scenes and play mode. Make sure tracks exist for any properties you want to record, then hit the circle next to the play button. Press it again to stop recording.Your recording will appear as a pending modification, that you can move around, apply, or cancel as before. When recording in play mode, make sure you save your movie as a Movie Resource or it will be lost when stopping the scene.
Additive Blending
Pending changes can be applied in additive mode by clicking the Additive toggle, next to the green Apply button.Additive mode will layer the changes on top of the existing tracks, instead of replacing the original contents.
Sequence Tracks
Movie projects can reference other movies using Sequence Tracks. You can create a sequence from an existing movie by pressing the File button, then Import Movie.The sequence will appear as a block on the timeline, that you can manipulate independently from other tracks. Sequence tracks always appear at the top of the track list.
You can also create a sequence using a time selection by pressing the Save As Sequence.. button. Any unlocked tracks will be saved in the new sequence, and a block will be created containing the selected time.