A cosmetic model skinned to both the main citizen (or human) skeleton and to some extra jiggle bones which are parented to the main skeleton.
A basic empty project with a scene with citizen (or human) and your cosmetic all set up and ready for testing, cosmetic skinned model set to bone merge to the citizen.
Setup
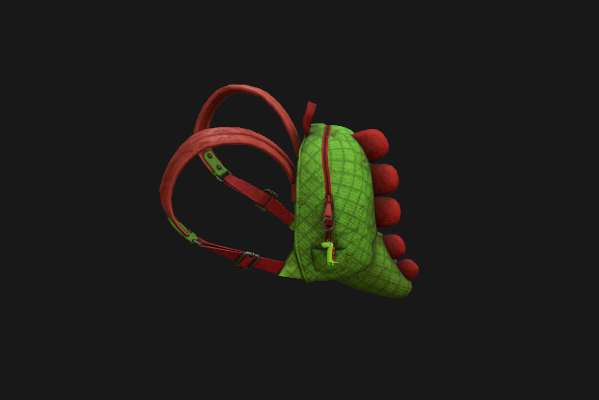
Let's start off by making sure you have a vmdl all set up with your materials and everything, I'll use this dinosaur backpack model I made because it will use 3 different jiggle bones with different settings on them: On mine I'm going to give the keychain a loose conical joint and the tail and backpack handle will use "weld" joints set to be slightly wiggly in their rotation.
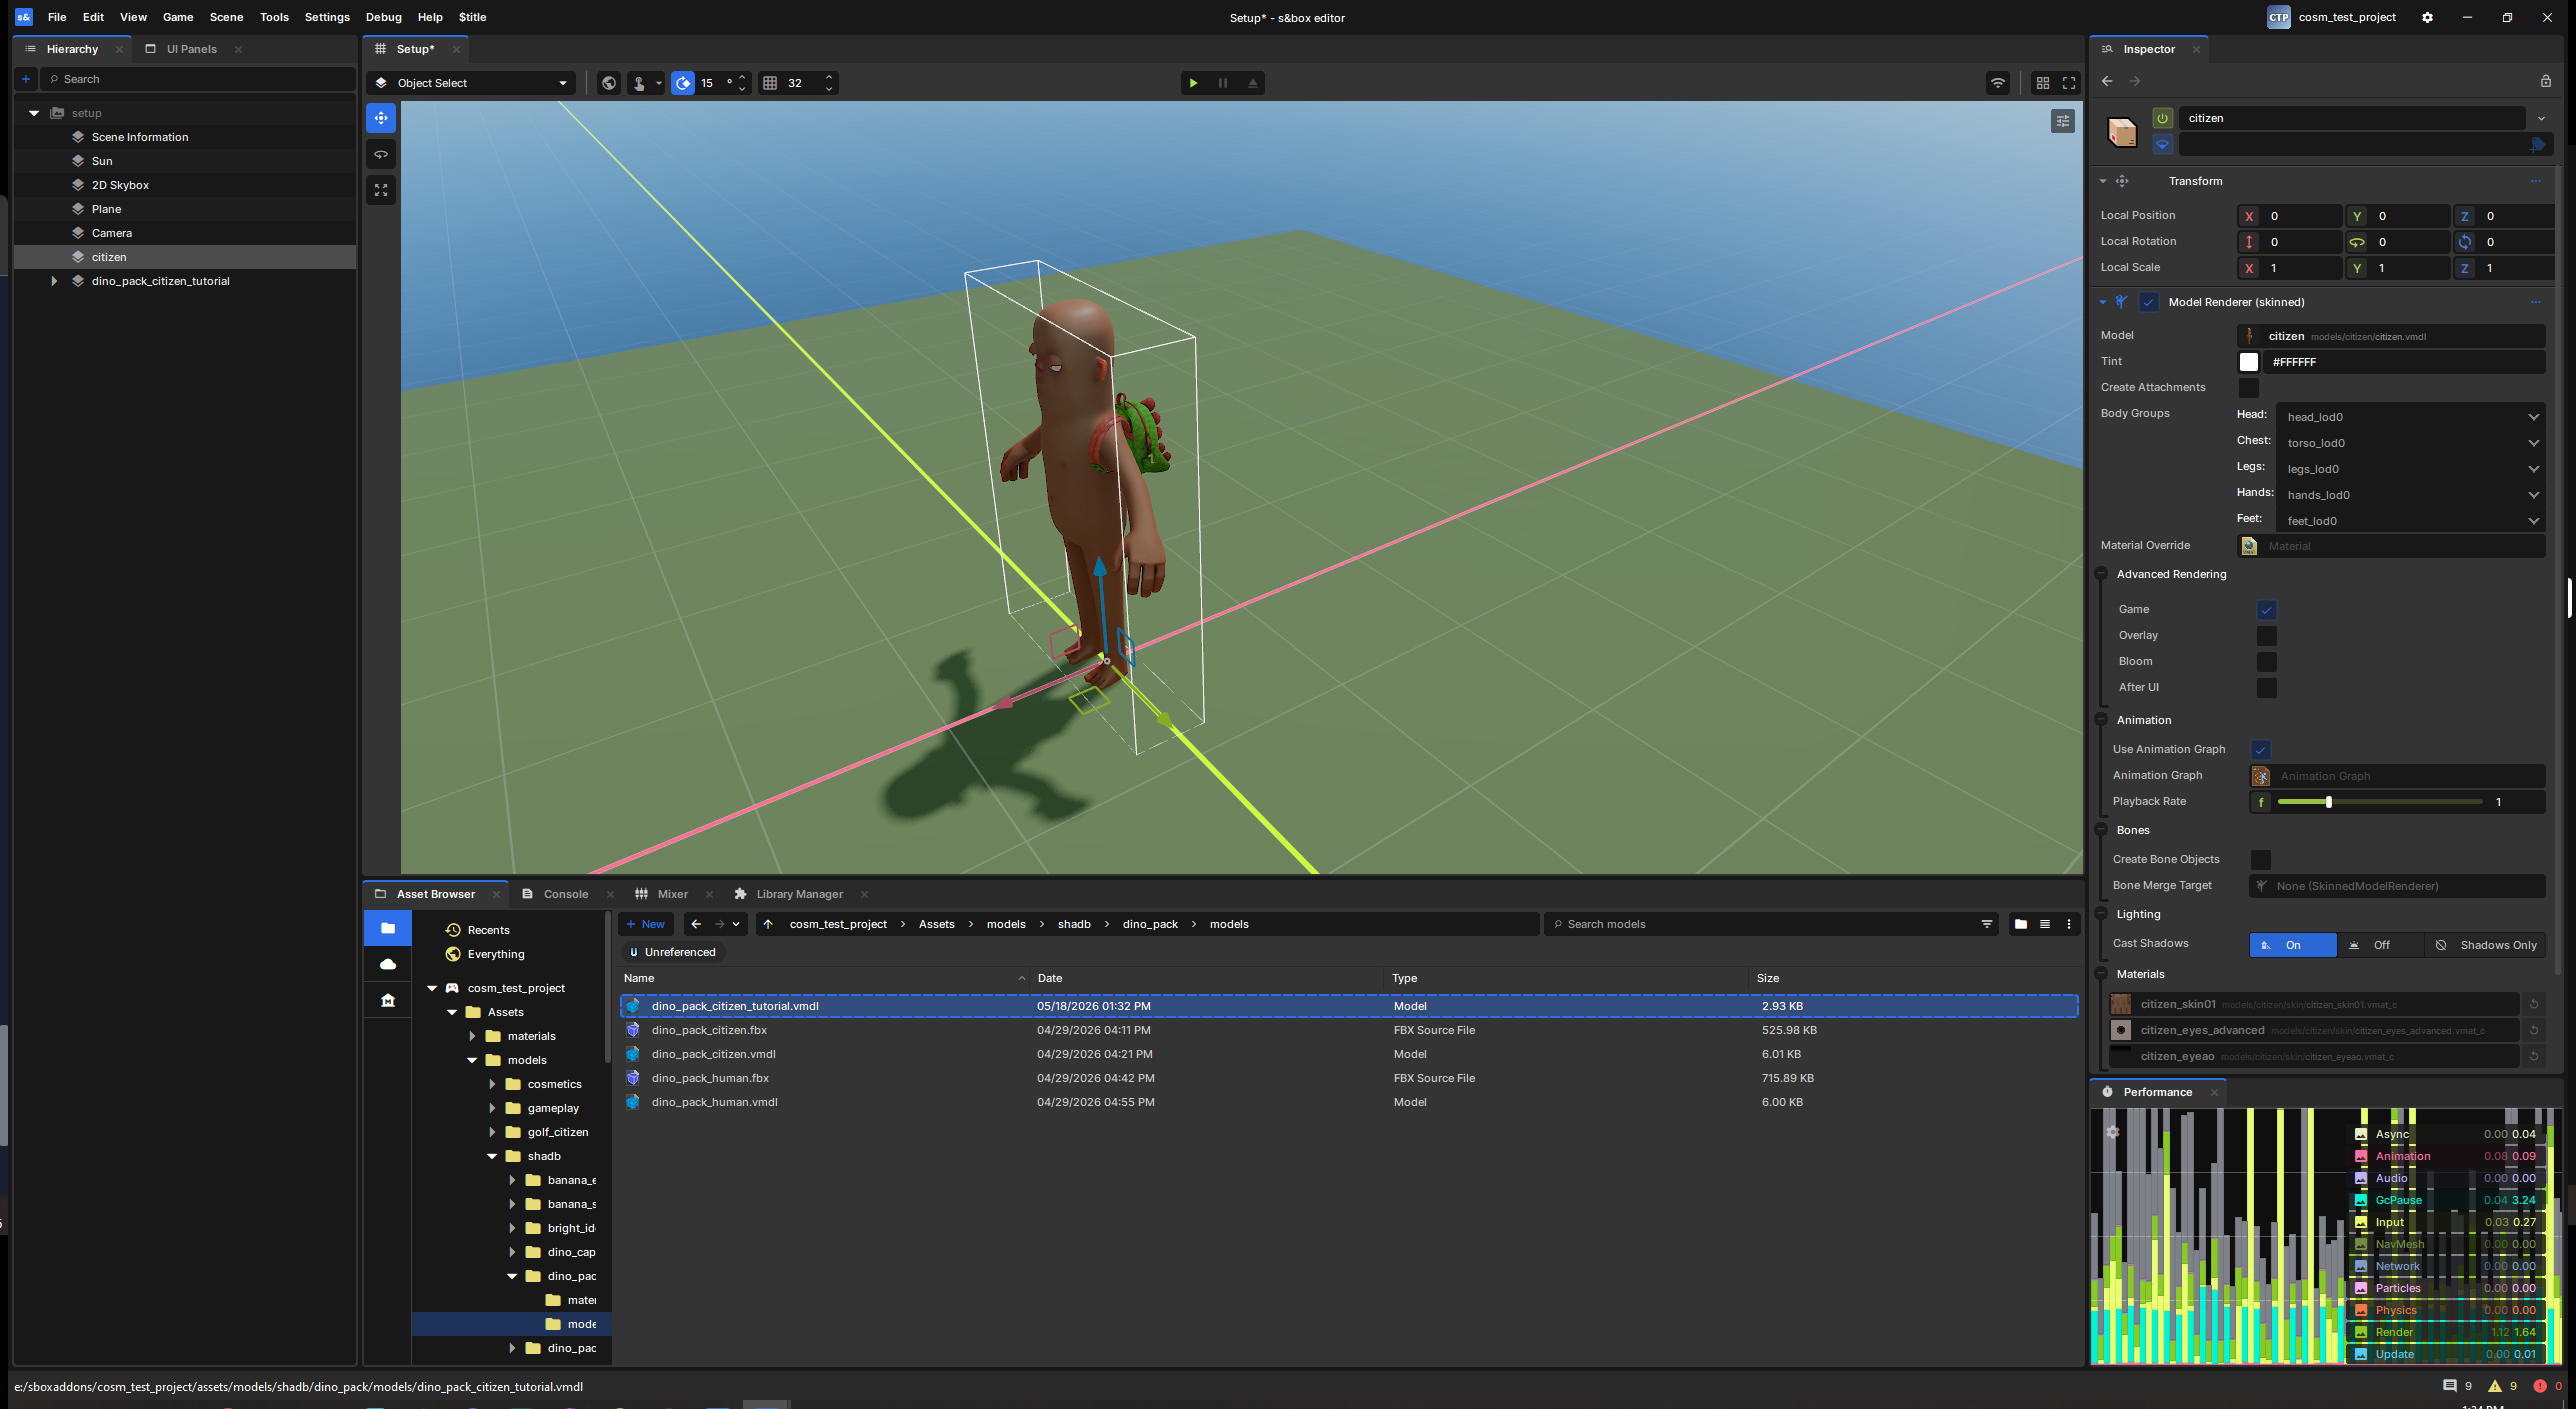
I usually set up a new scene something like this: which is just the default minimal scene but with an object added with skinned model renderer attached with citizen assigned, then I duplicate that and change the model to my cosmetic, and then I assign the "bone merge target" on it to be the citizen object.
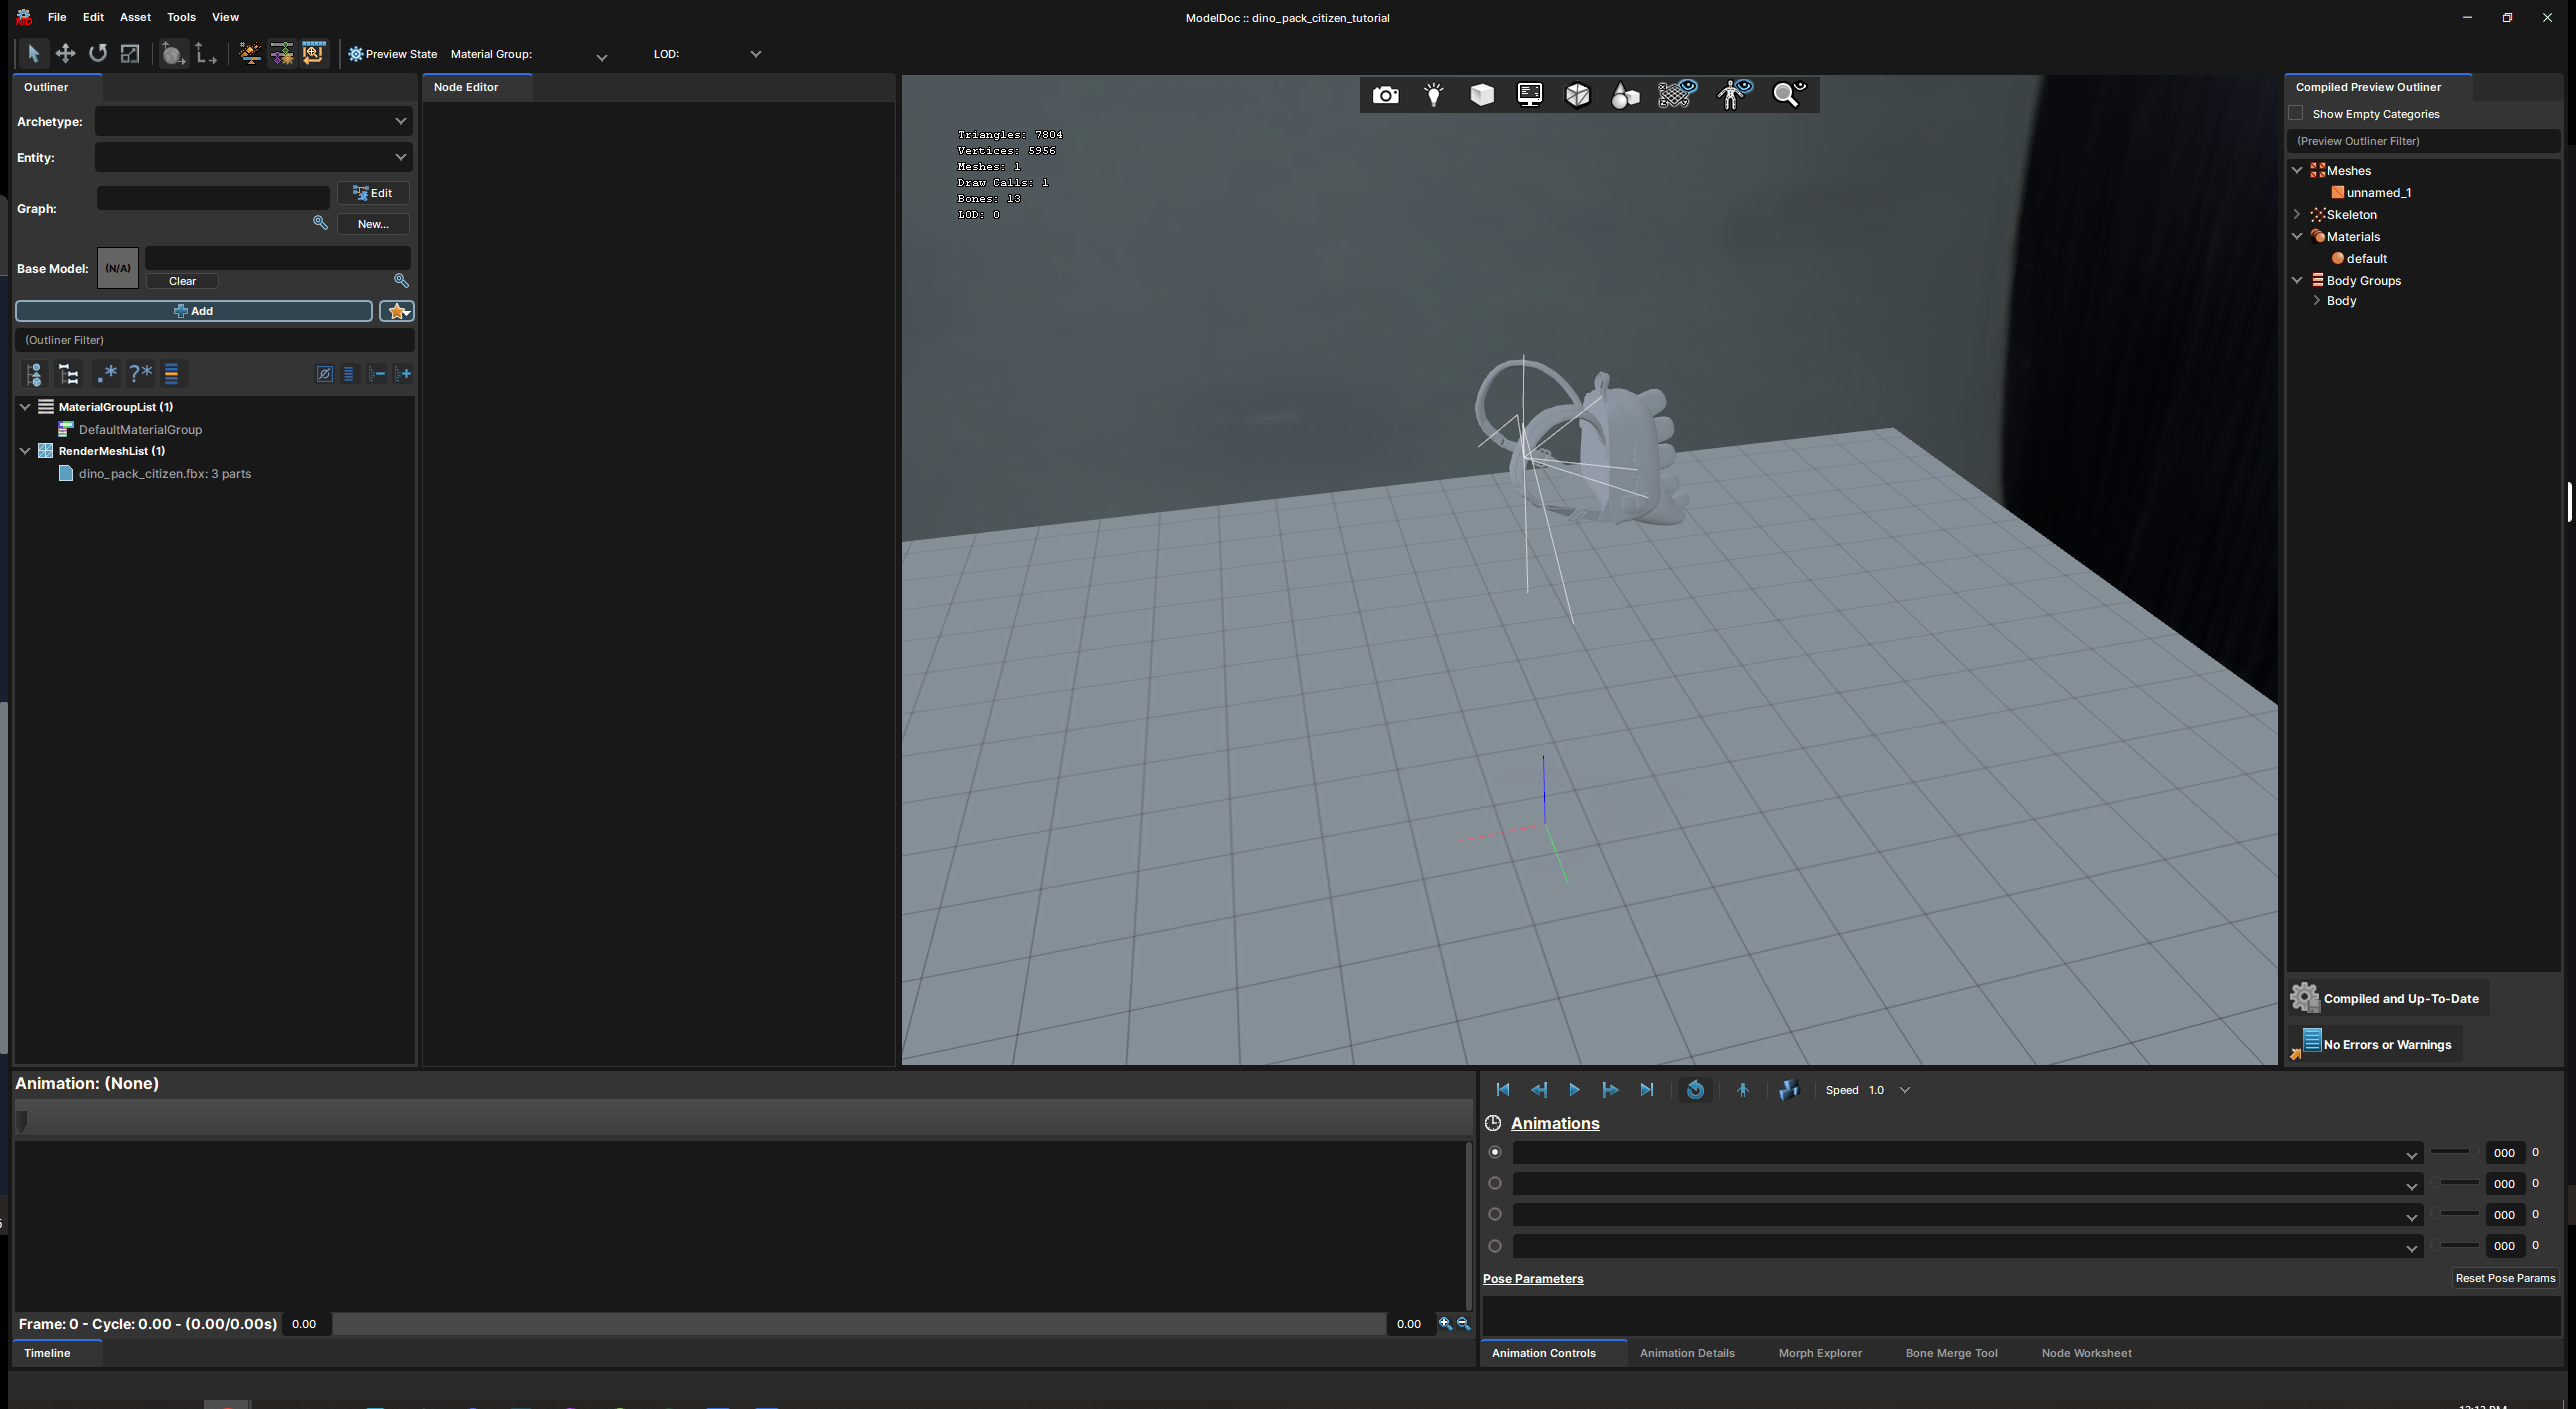
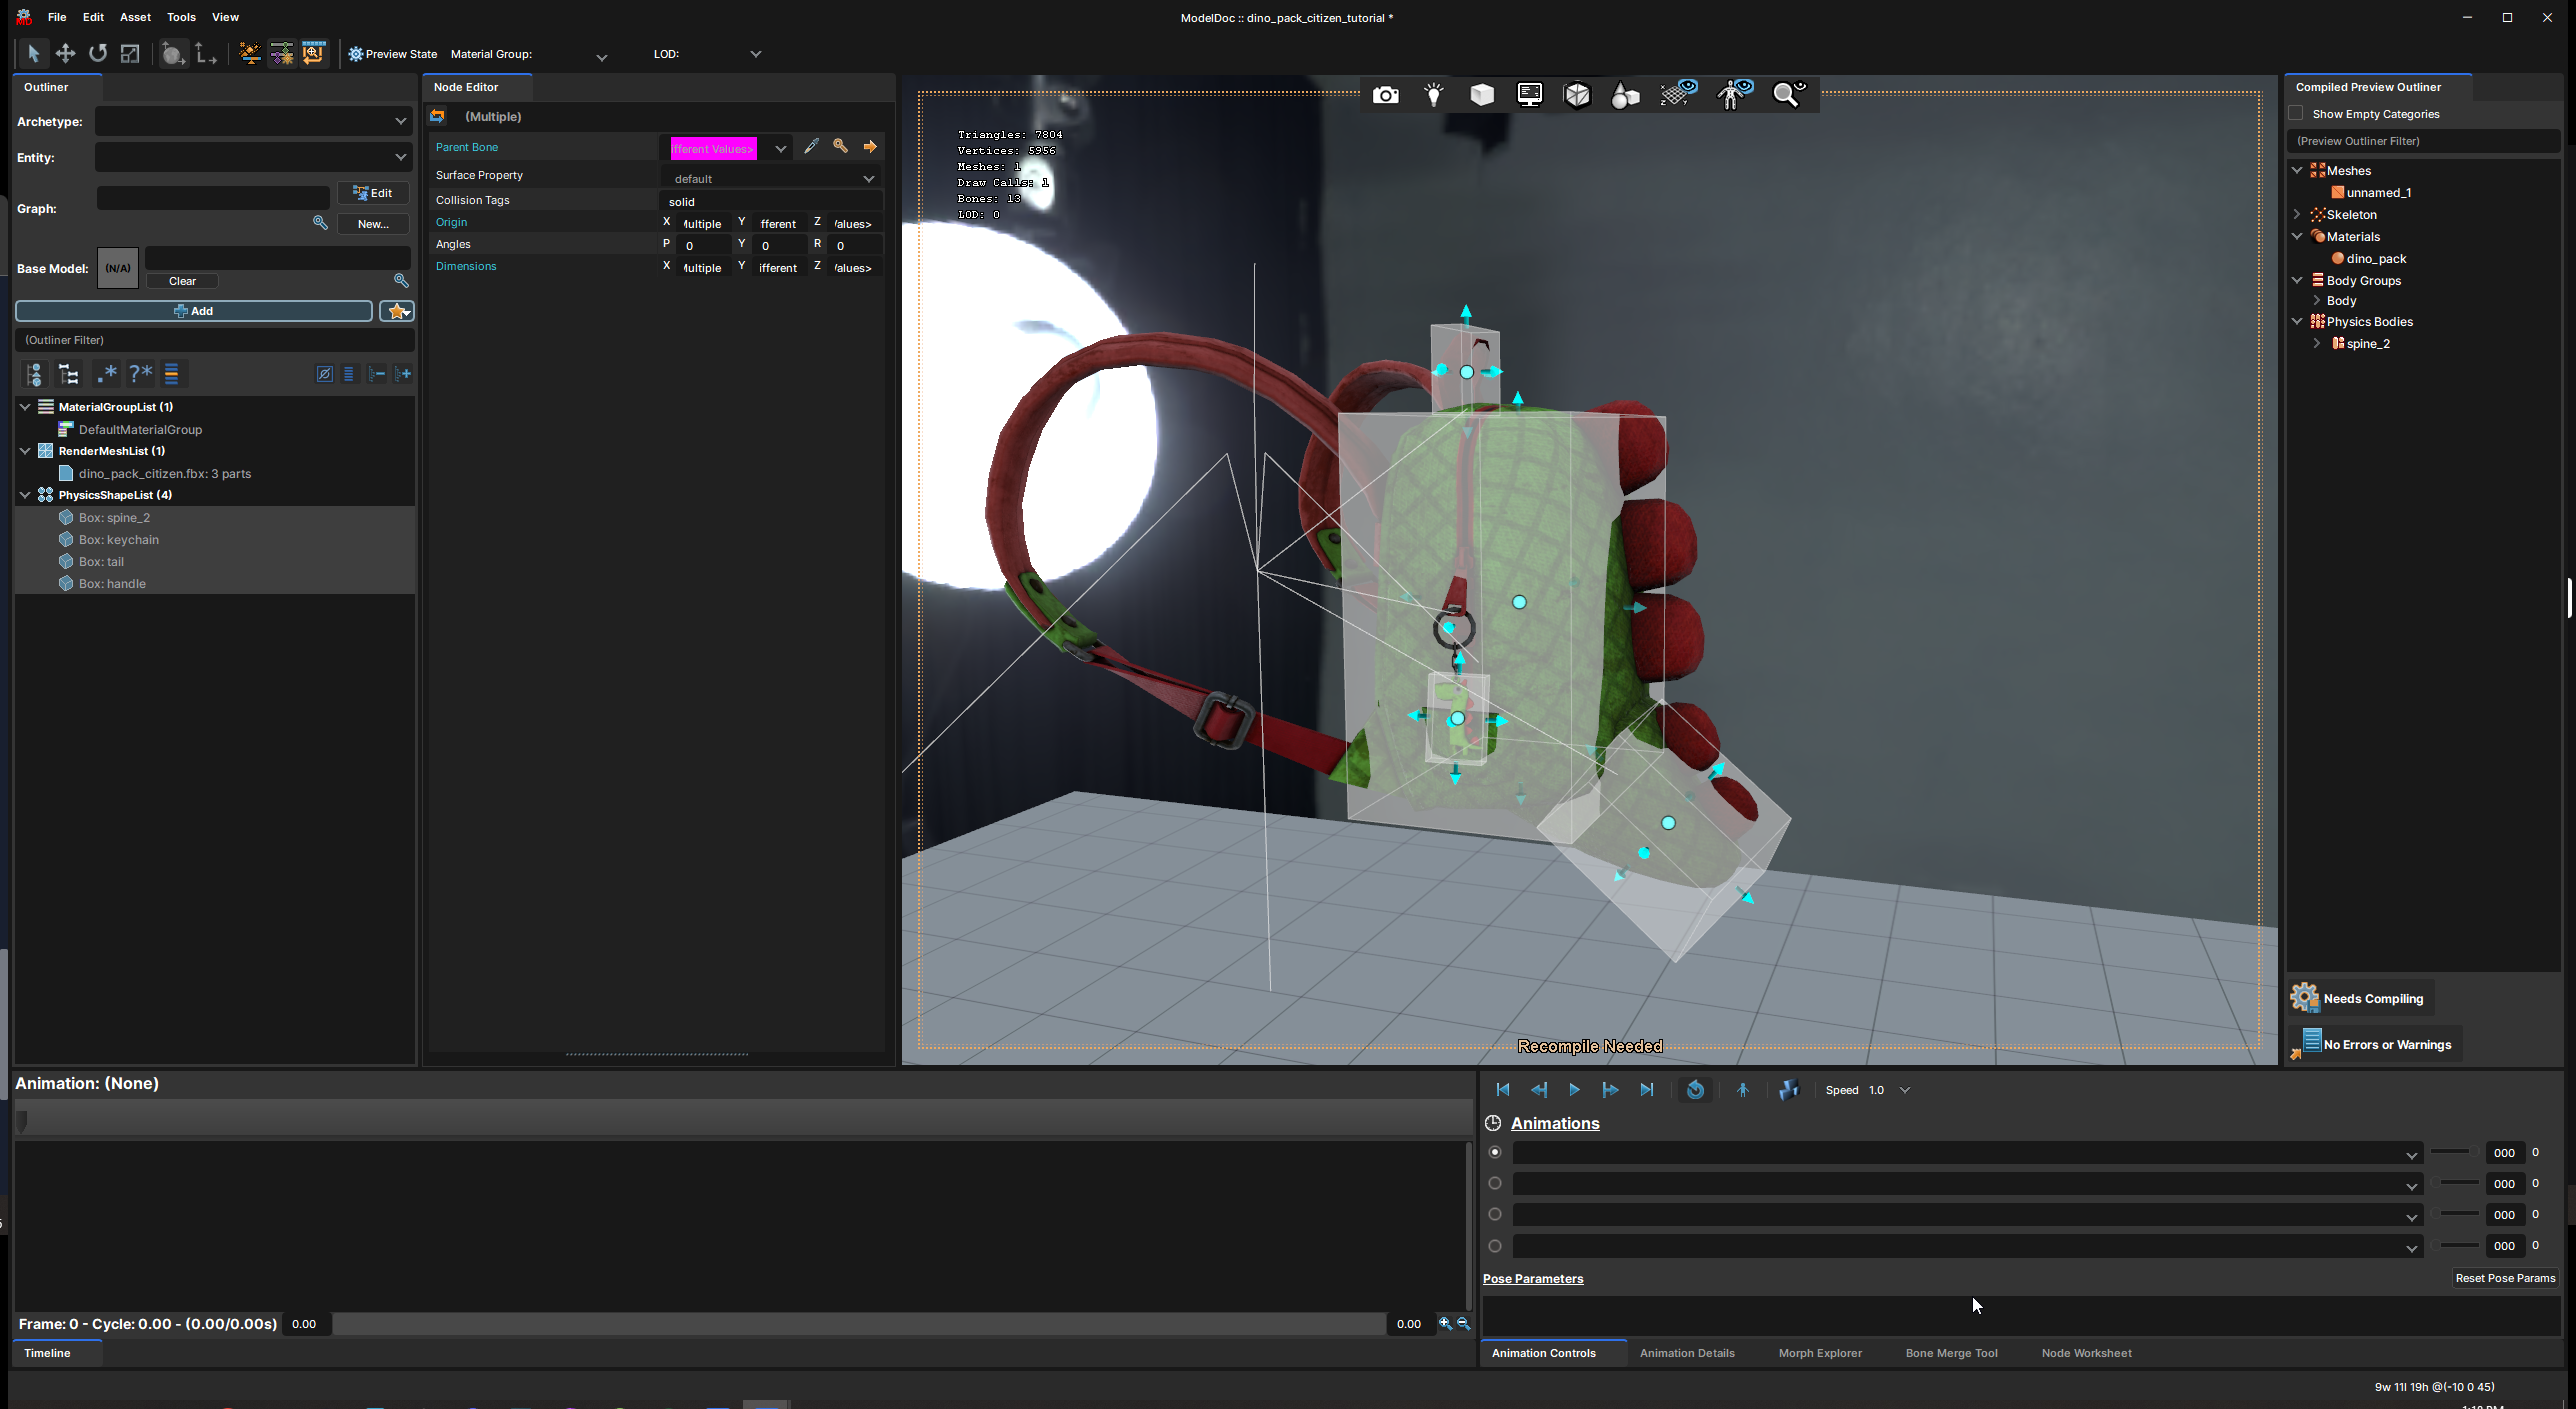
When you first right-click and create a model from an FBX file your file will look like this, you should know about this stuff before starting this tutorial, I'll omit adding materials and stuff for the sake of brevity.
Physics shapes
From here I'm going to start adding "PhysicsShape" nodes, these are physics bodies that are evaluated by the engine at runtime for physics, basically like colliders, except in a bone merged model they won't collide with anything but themselves and sort of simulate in a local physics environment separate from the world.
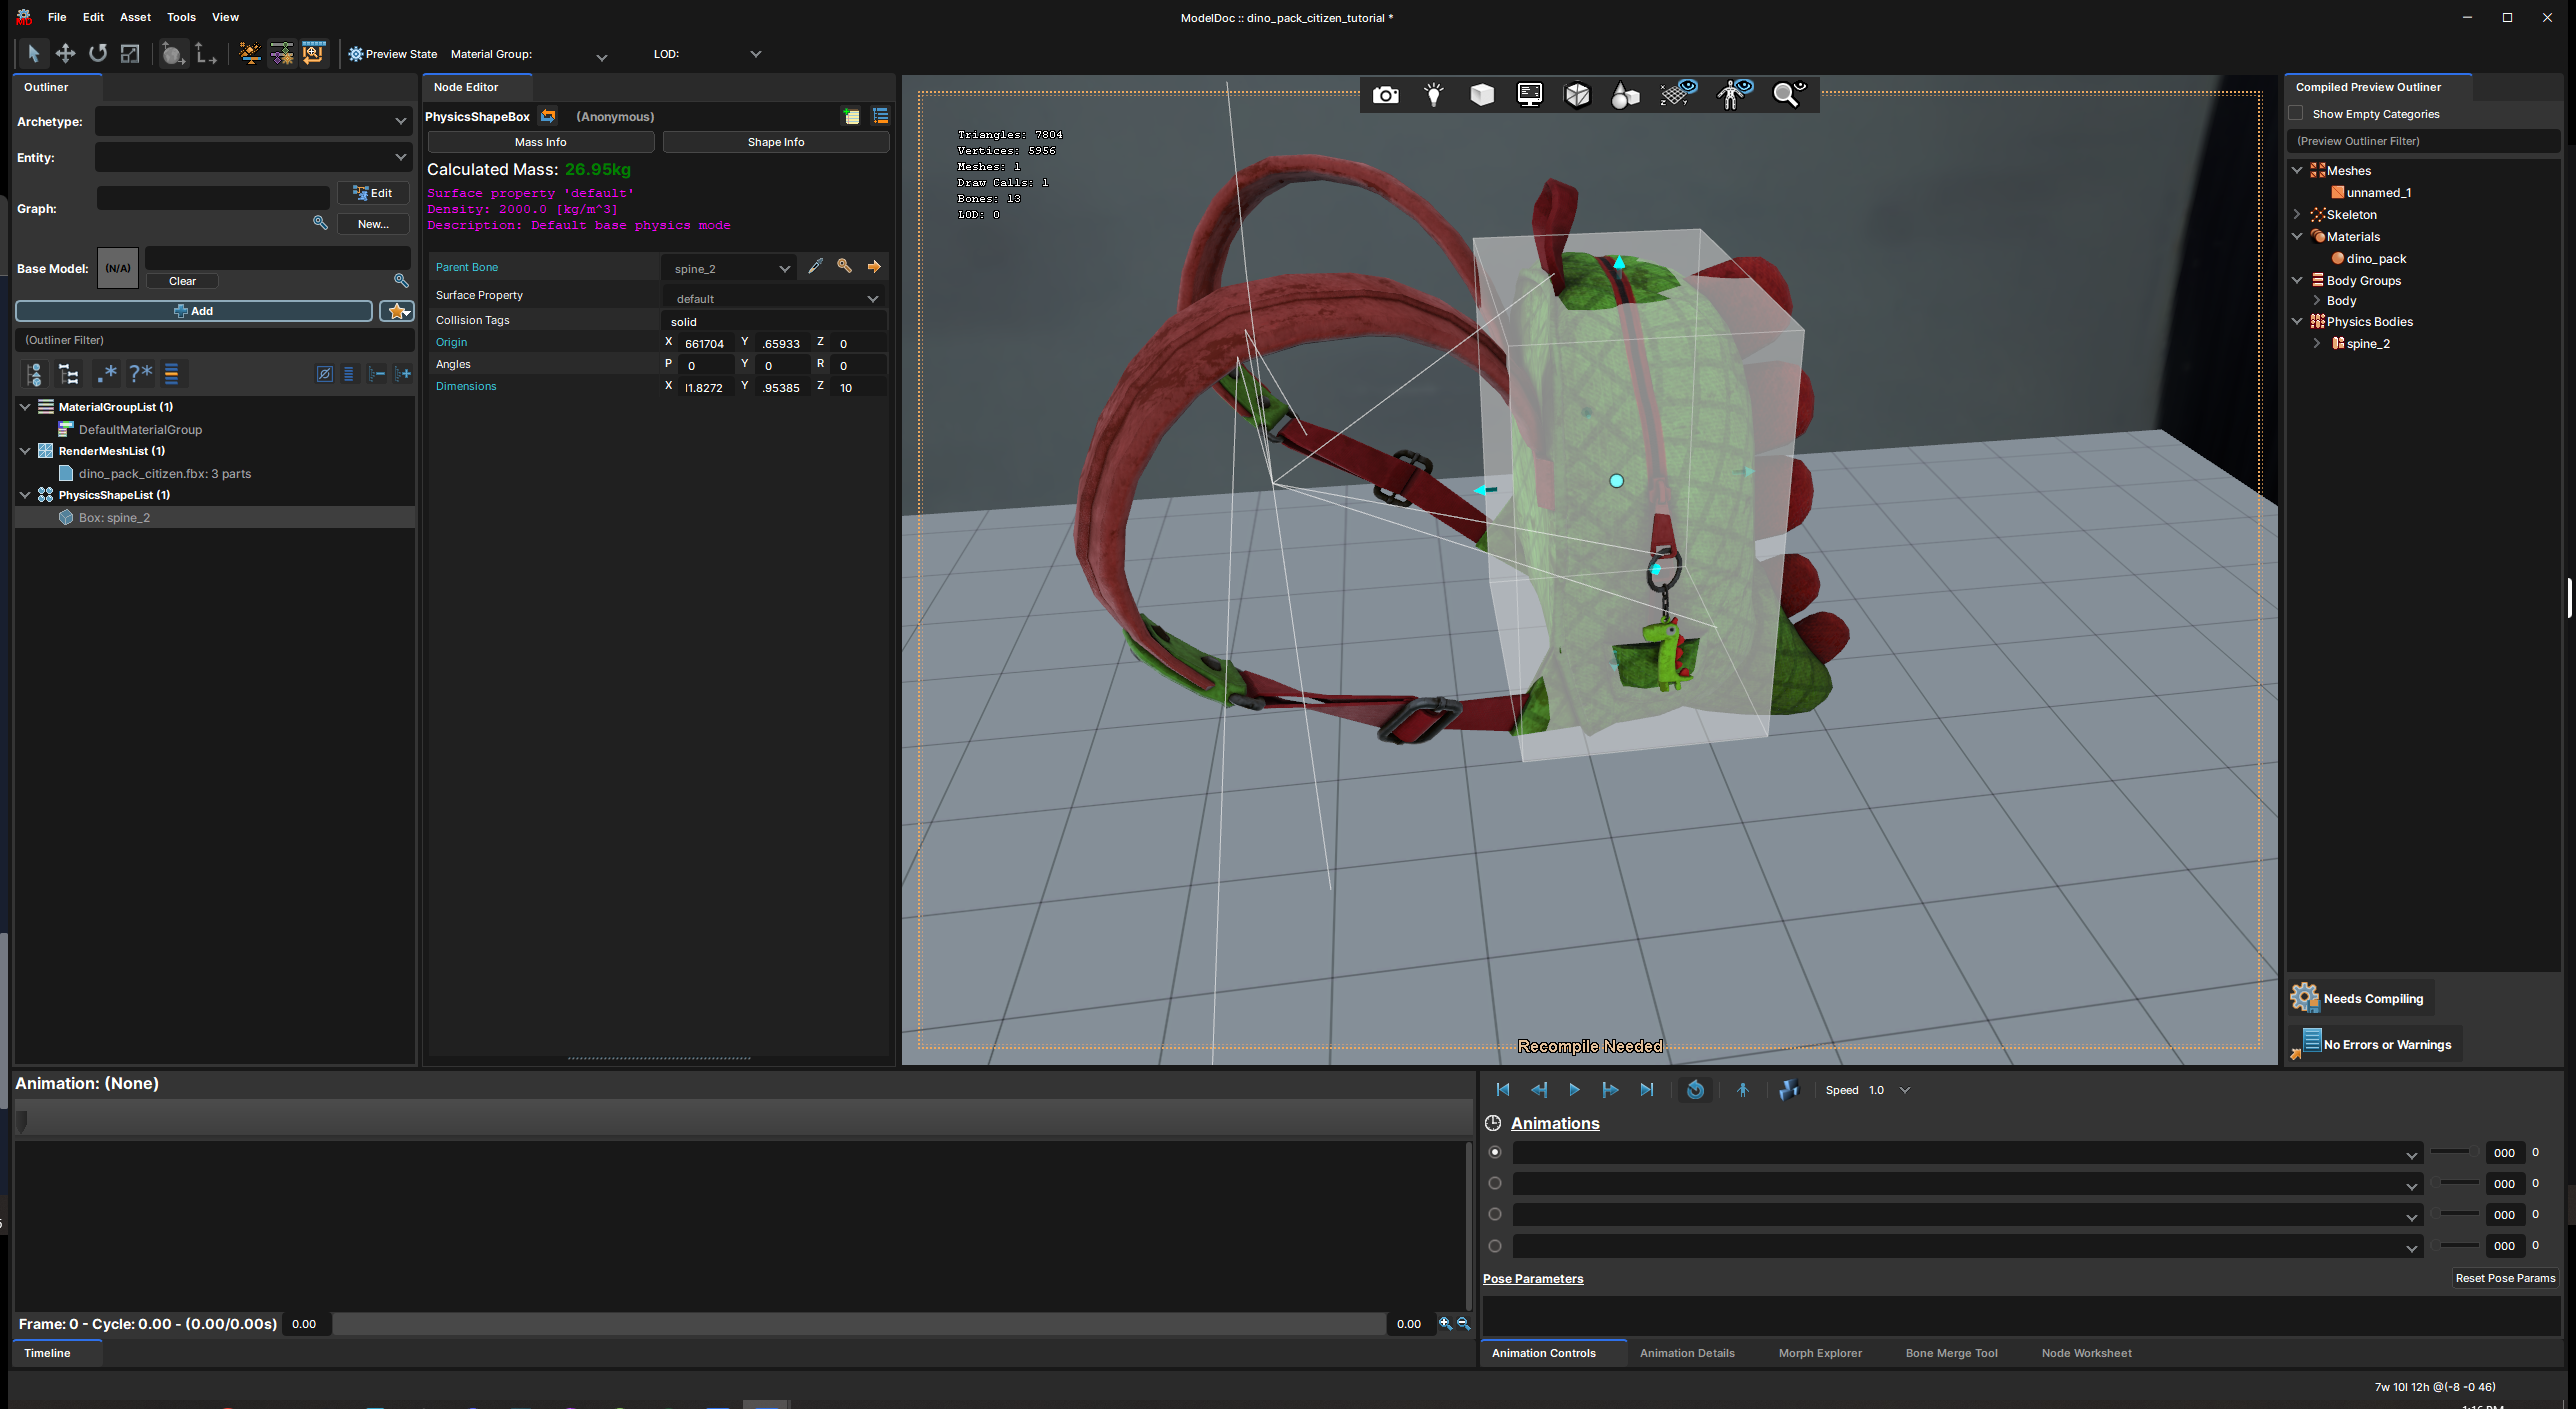
In my case, I start by adding a PhysicsShapeBox to the "spine_2" bone, this is because jiggle bones need at least one "solid" attachment point, by solid attachment point I mean a physics shape that attaches to a bone in the citizen's skeleton. This could be the head bone, it could be hand bones, any bone that makes sense for your cosmetic.
You generally want to make it vaguely shaped like the bodypart you're attaching to in case any jiggle bones need to collide with it to look correct, in my case I'm going to offset it a bit to act as the "main body" of the backpack instead, for the keychain to collide against
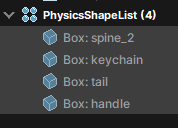
Now I'm going to add physics shapes to all my jiggle bones. This shape informs the size and weight of your item, you can set its surface material if it acts too heavy/light and even make a new one specifically for your item, but most of the built in ones generally cover things. It'll also actually collide with itself using this shape so you'll want it to be at least vaguely accurate.
I would stick to primitive physics shapes (box, sphere, capsule) though because using hull collision for jiggle bones is a little overkill. I'm just going for boxes in my example. You can see on the left that I've attached them to the different jiggle bones, like this:
Joints
Now you have a few decisions to make about how you want your jiggle bone to act. Different joints have different types of movement, let me outline them a bit:
Conical joint: Generally very freely rotating, sticks in place position-wise, used for things like key chains or floppy rags. Sort of tricky to set up, but useful if you want to 100% limit rotation on something in a specific direction.
Weld joint: Extremely versatile and configurable. This joint I like the most because you get direct control over how stiff/loose it is in both position and rotation, but you can't easily "hard limit" its rotation, it's usually all or nothing, though with a proper collider setup and self-collision enabled on it you can do a decent job.
Spherical joint: A lot like the conical joint but it will literally flop in any direction, can't limit rotation at all except through colliders and enabling collision.
There's a few more joints there but I generally stick to one of those.
I'll be using a conical joint for the keychain to make it nice and jiggly, and a weld joint for the backpack handle and tail, configured to be rock solid in position but slightly wiggly in rotation, so they flop around while the player is walking around but stay in place on the backpack without stretching out.
Now comes a big important step: Creating and positioning the joints.
When you first create a joint it will stick itself directly to the center of the parent body's joint, which is usually not the pivot point you want.
This positioning process is usually a bit of an eyeballing thing, getting it exactly on the jiggle bone's position is a bit annoying but bear with it, it's definitely a step you'll want to make sure to get at least sort of right since the joint's "anchor origin" decides where the pivot point of the joint is when it's rotating.
Hit "T" to get a move gizmo in the scene view and move the joint into place.
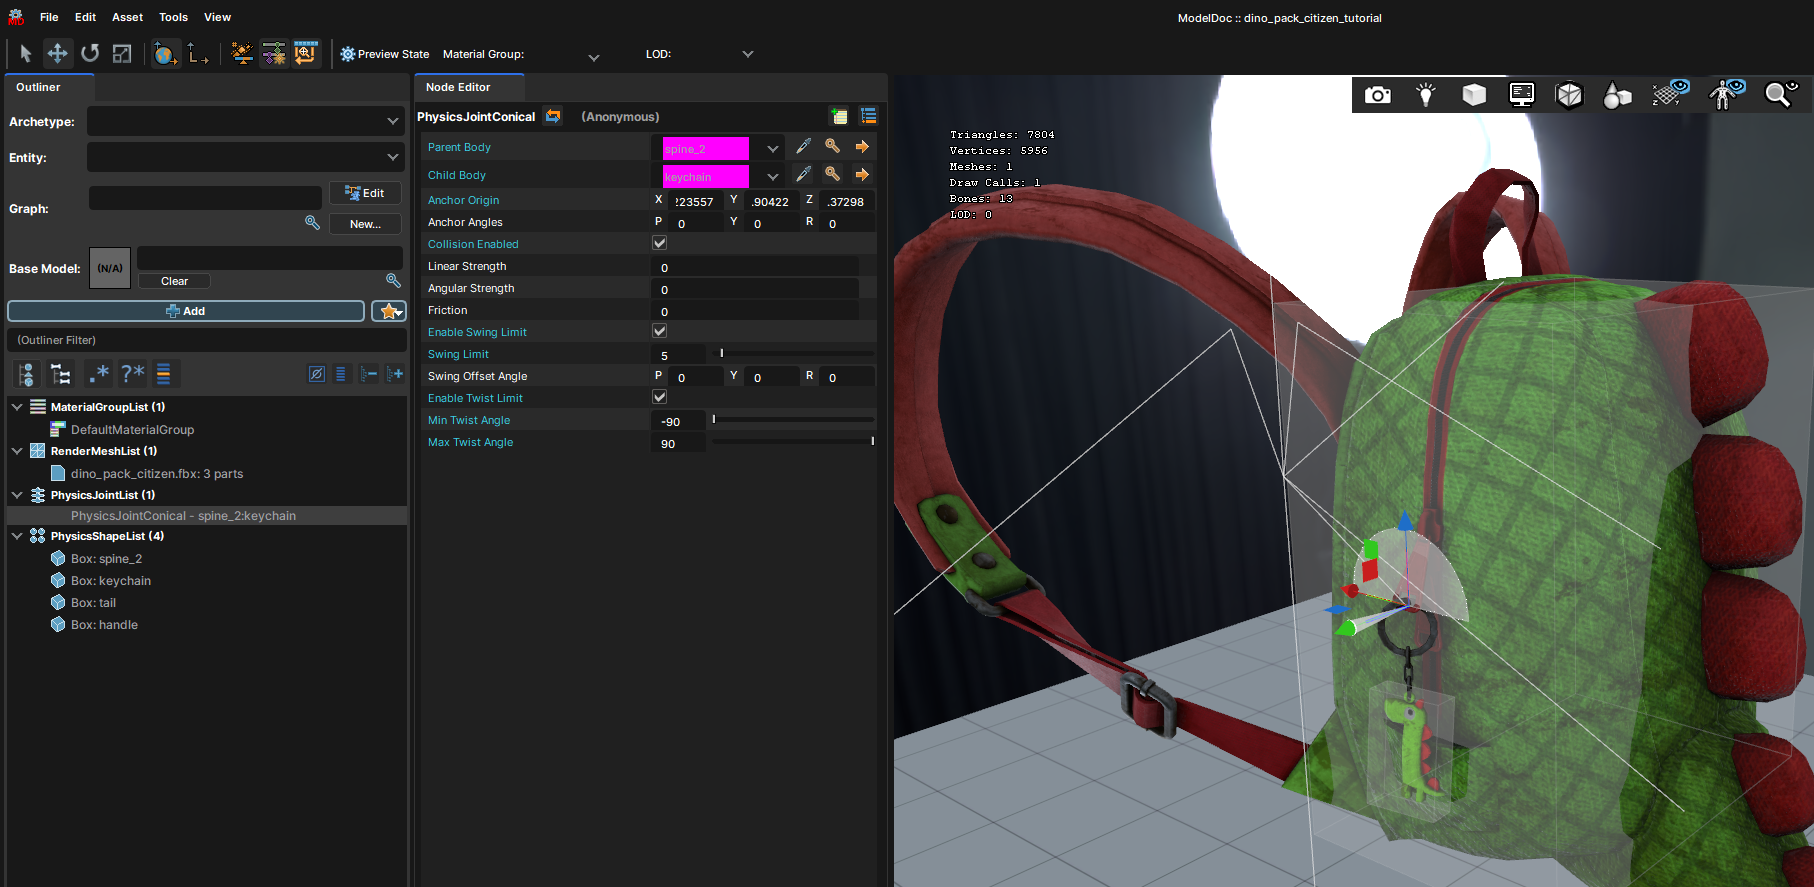
My keychain I want to be able to swing back and forth but not tilt so much so here is my conical joint setup for that:The joint should show the limits pretty well, sometimes twist and swing is rotated in a weird direction, then you can hit R and change the anchor rotation a bit so it lines up better with what you're expecting.
Note: If you enable twist/swing limits but keep them at 0 they won't limit at all, so you're gonna want to set them tosomethingat least.
Now we can start testing if this worked or not in the editor, go to your scene with your citizen and cosmetic model set up, and hit play.
You should see your jiggle bone simulate, you can select the citizen object and open up the parameters panel on the inspector window on the right to set different animations on it, I like using "duck" which give you control over its crouch level with a little slider. Note: If you have multiple jiggle bones and haven't set up their joints yet they will just fall through the ground infinitely like in my video, this makes sense because they're being physically simulated but aren't attached to anything so they just keep falling forever.
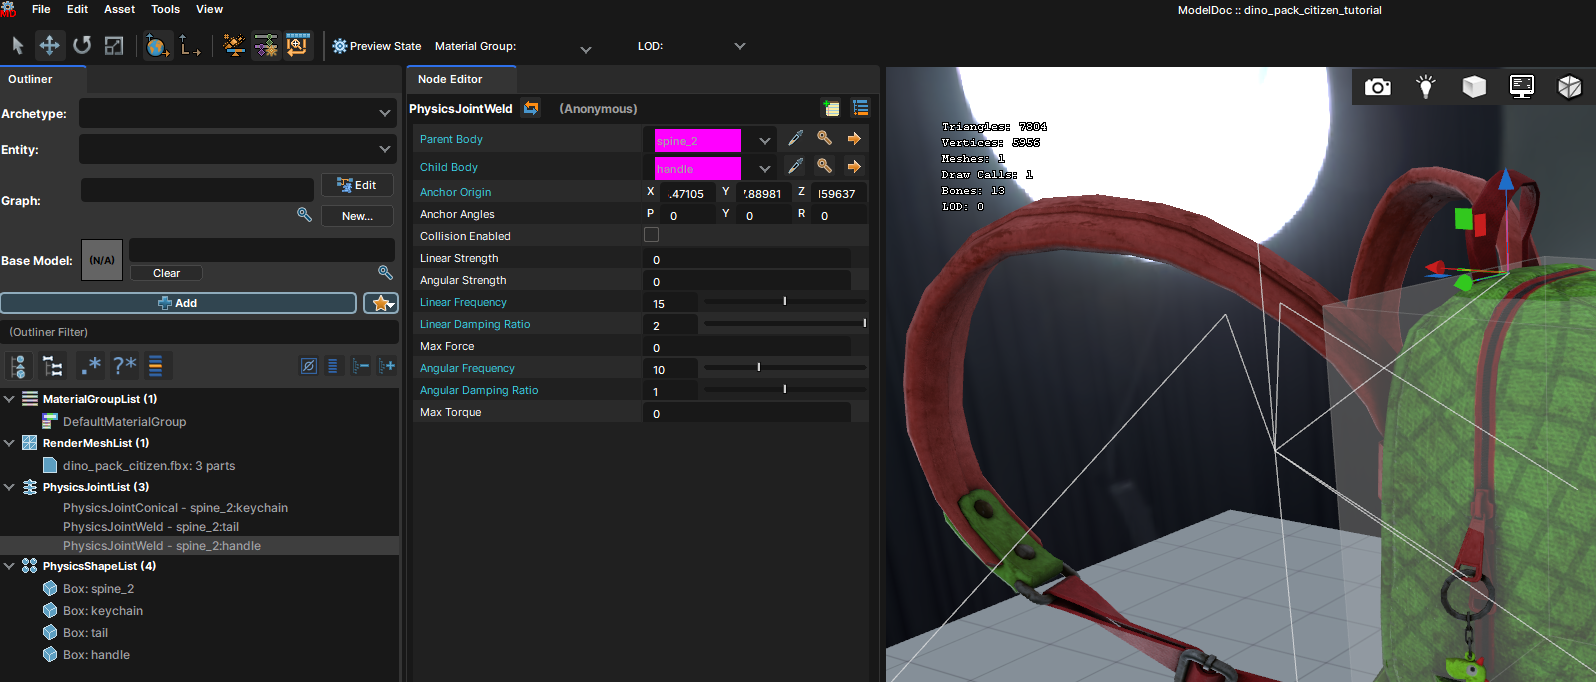
Now I'm going to set up the tail and handle with weld joints, they'll have very similar settings to each other so I can just set one up and copy the joint then change the target bones and reposition the joint: These are a bit trial-and-error, basically if you set the frequency lower it becomes more "weak" and if you set the damping ratio higher they'll lag behind a bit and be less "springy", play with these values a bit and find something that works for the effect you're going after. Here's what that looks like on mine: Linear vs angular is basically position and rotation, on mine I set the position frequency higher because I want the bones to stick closer to where I attached them.
That's it! That should cover everything you need to know about jiggle bones.