For example here, the image has to be in Assets/Images, and the name is example.png. You can always change the path, but keep in mind that the images have to be inside of Assets/ and you always have to add the file extension (.png / .jpeg / .webp).
To automatically create the component, we will use this .cs script:
using System;
public sealed class ImageComponent : Component
{
	public ScreenPanel screenPanel;
	public ImageExample UiElement;
	protected override void OnAwake()
	{
		screenPanel = GameObject.Components.GetOrCreate<ScreenPanel>();
		UiElement = GameObject.Components.GetOrCreate<ImageExample>();
	}
}
It is important that you name the Razor component ImageExample.razor for it to work, or change the class name in the C# script. Now, we will create a new empty GameObject in the scene and add the ImageComponent component to it. After saving the scene, you should see the image.
Now you can add an SCSS file to style the image, named ImageExample.razor.scss, with this content:
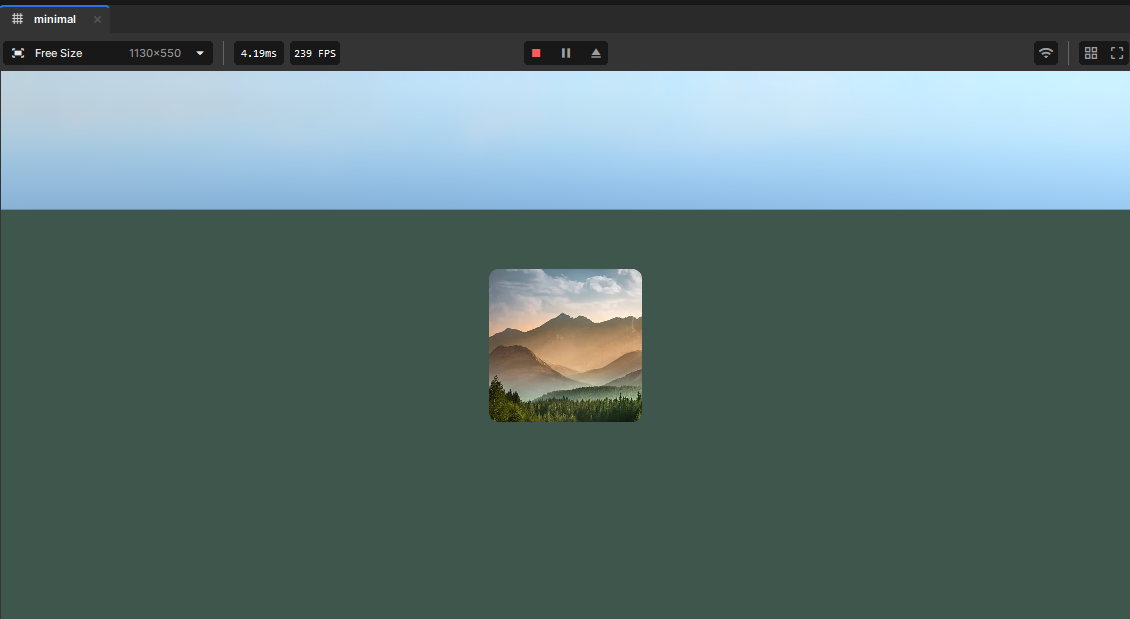
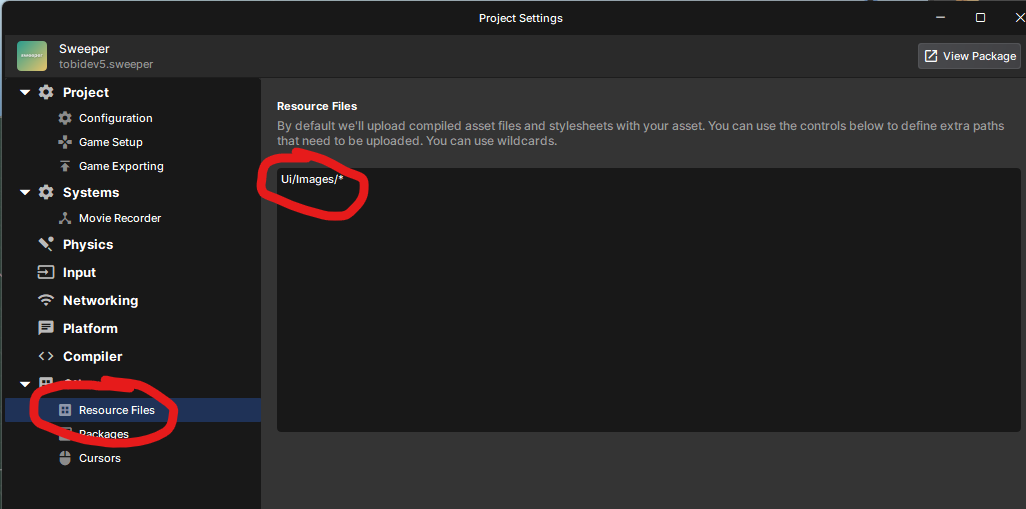
It should now look something like this:The problem is that when starting a new game instance, we can't see the image anymore. So we have to go to Settings -> Other -> Resource Files and then put in our image path like this, ignoring the Assets/ folder. For example: Ui/Images/*
After that, we can start new instances of the game and the image will be there.
Common Problems:
If the image doesn't show up or takes up half of the screen, check if your scripts are named like this:
Also, make sure that your image is in the right path and that you either changed the path in the script or use an image calledexample.png.
Make sure you have a GameObject with the Image component and that you saved the scene.
Make sure you didn't forget the "*" in the resource file path: Correct: Ui/Images/*Incorrect: Ui/Images/
If it still doesn't work you can join my discord server and ask for help:
If this tutorial helped you, please rate it and leave a like