In this tutorial, we'll cover importing a 3D model for use in s&box using ModelDoc.
Start by ensuring you have a project open - if you don't know how to do this, check out this guide for Creating your First Project
Setup
Importing a 3D model
All projects load data from their Assets folder, and it's up to you how you'd like to organize your file structure within that.
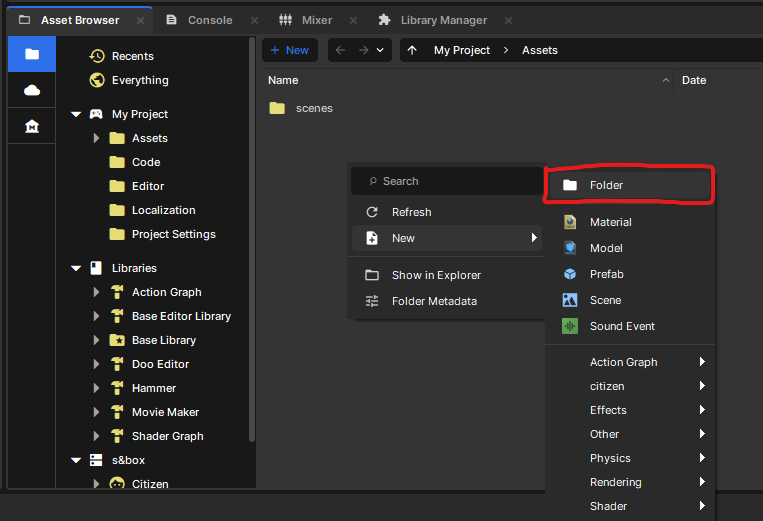
In this case, we'll go into the Asset Browser (or File Explorer) and add a Models folder for our model files to go into.
Next, drag your modeland any associated texture files into the Asset Browser to import them into the project.
For 3D models we recommend either .fbx or .obj file formats For textures we support .png, .jpeg & .tga file formats
We're going to use this oil drum as an example - you can see all our image textures and our .fbx file.
Creating a .vmdl
Now we can make our .vmdl - this stores all of the prop data to make it function.
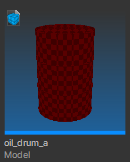
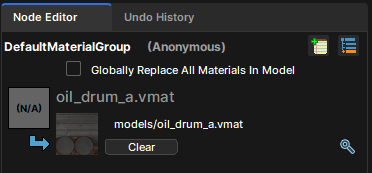
Right-click on your imported 3d file > Create Model...This will assign the model as the rendered mesh and set it's name to mirror that of the 3d file. You can see from the thumbnail, we're missing a material! So let's fix that real quick.
Creating a .vmat
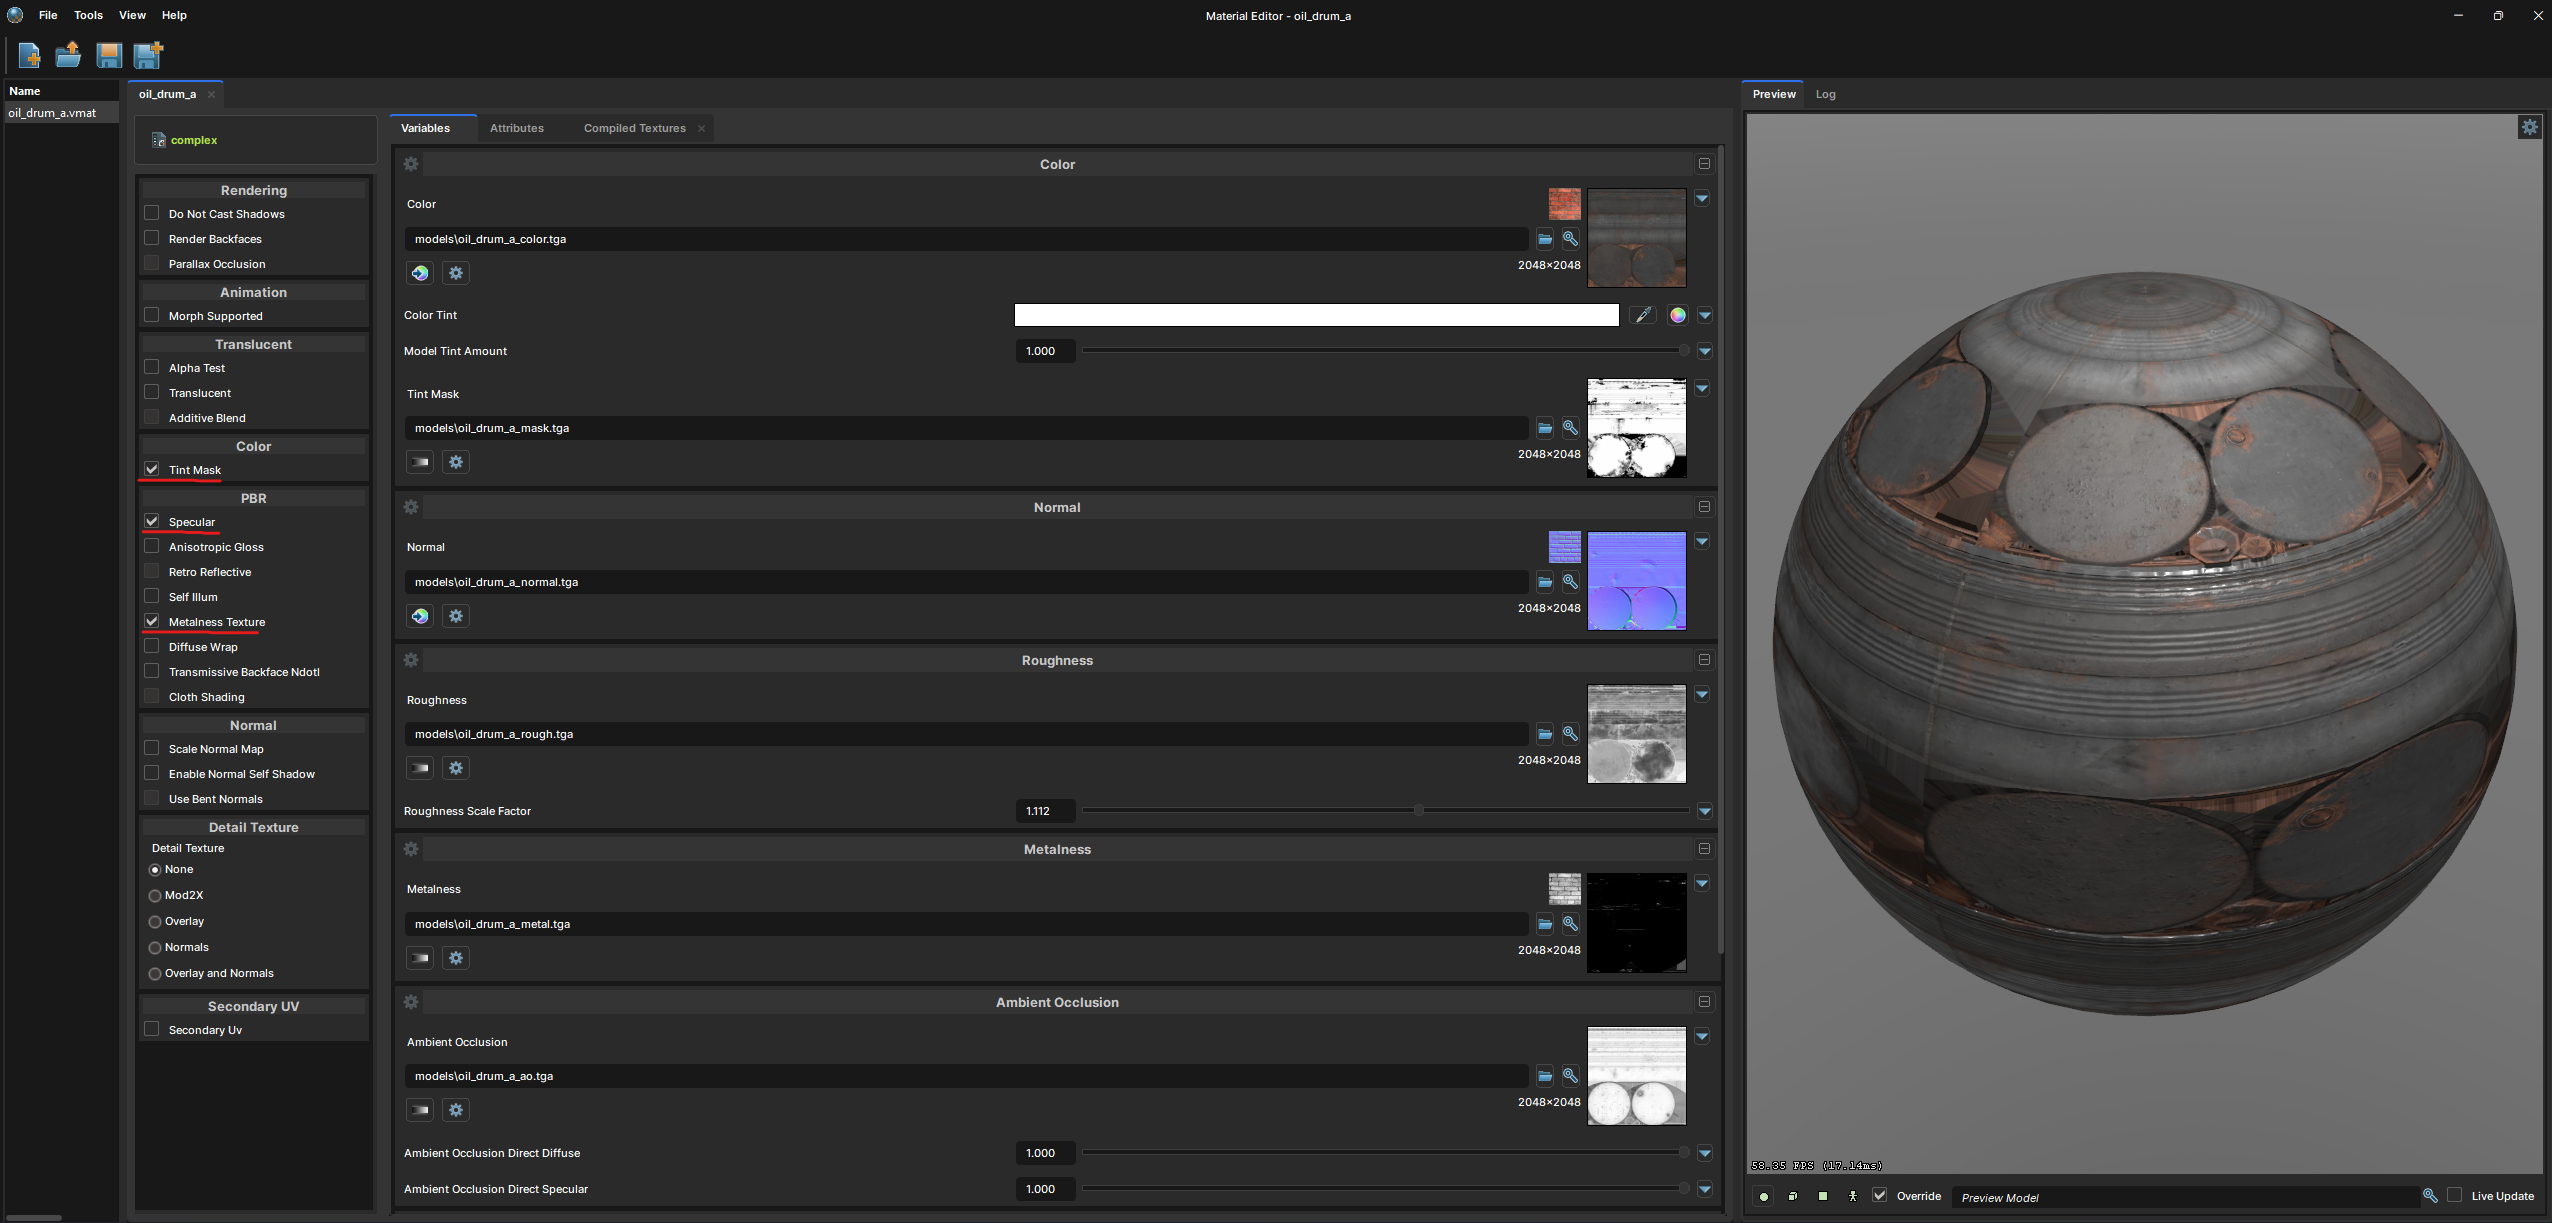
A .vmat is just a Material - you plug in your textures, choose a shader to render them and then you can assign the material to your models.
Same as the .vmdl, you can right-click one of your textures and choose Create Material. We won't go into detail on the Material Editor, just double click the newly created material and make sure all of your textures are plugged into the correct inputs.
As mentioned under the Naming Conventions section, if your textures have the appropriate naming conventions, they will automatically be plugged into all relevant texture inputs after clicking Create Material. Neat!
If your model has a metalness, emissive or tint mask, make sure to check those on the left column and plug those in as well. Enable Specular for proper light reflections.Now we can double-click the .vmdl we created before and take a look at ModelDoc!
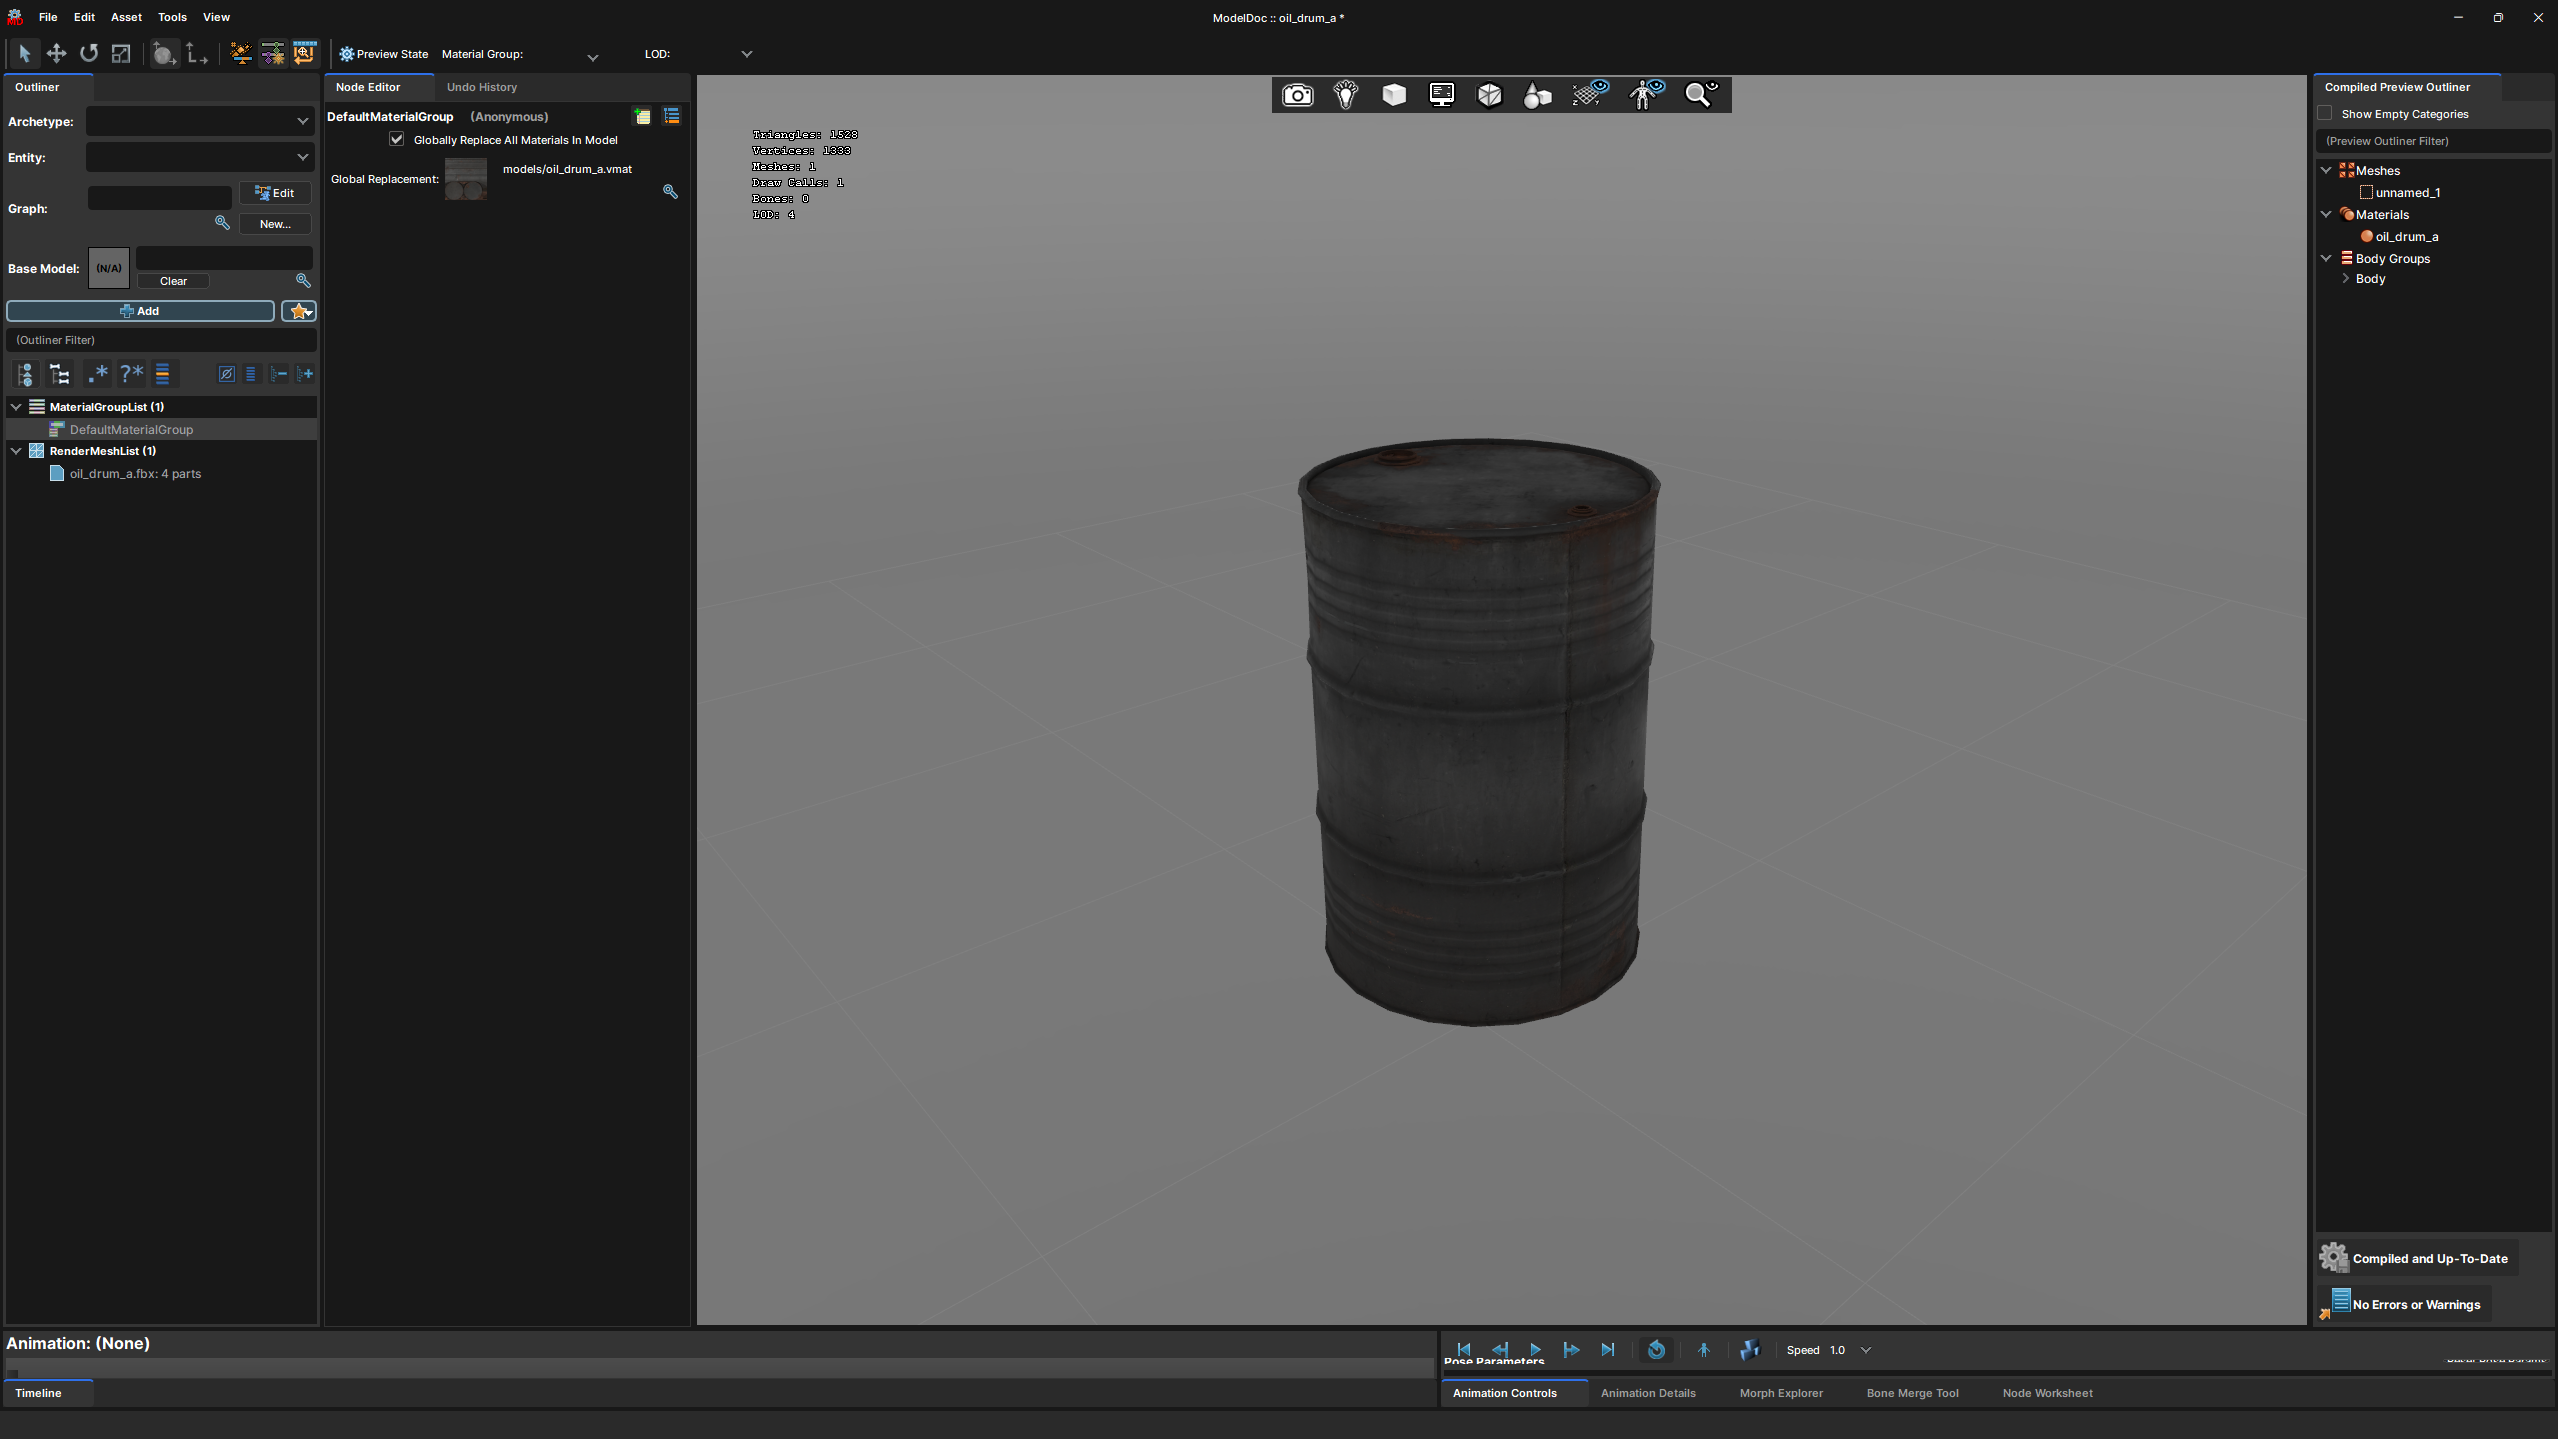
ModelDoc
Opening your model, you should see ModelDoc looking pretty close to the above.
If your 3d model includes level of detail meshes, they may have been automatically set up for you, but for tutorial purposes we'll start with a mostly clean .vmdl.
Interface
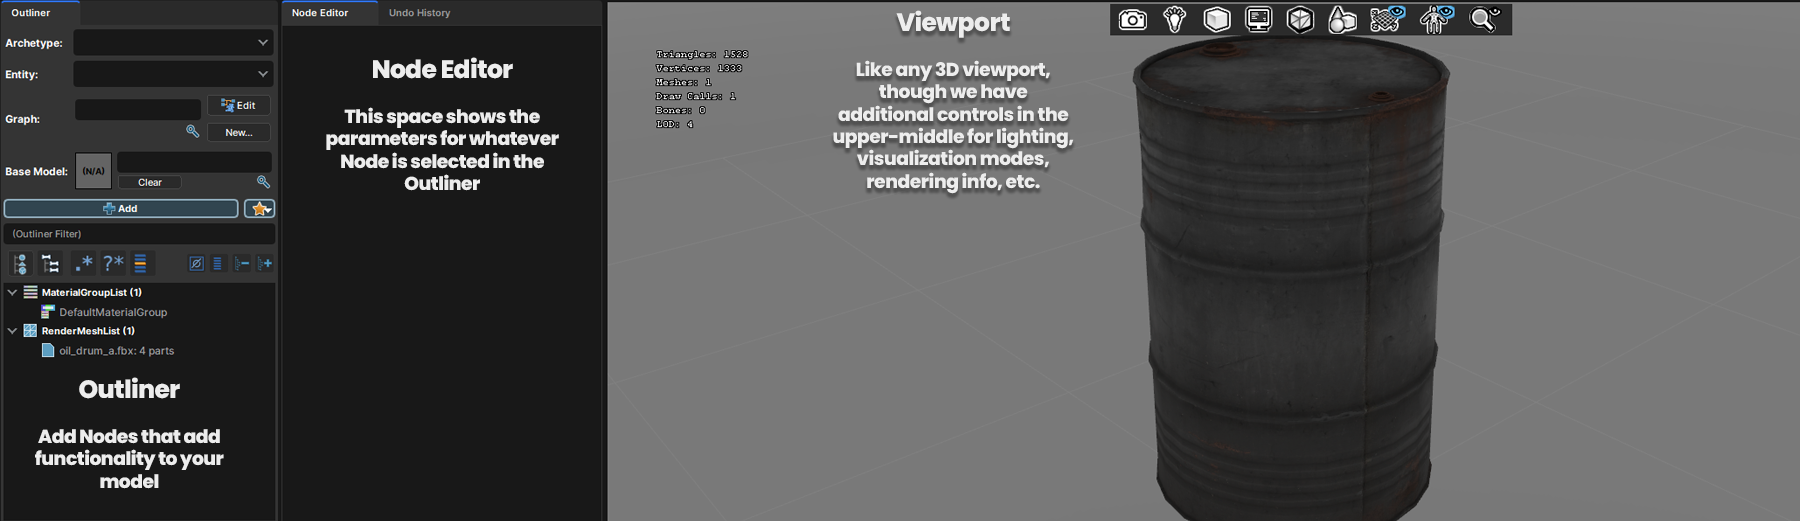
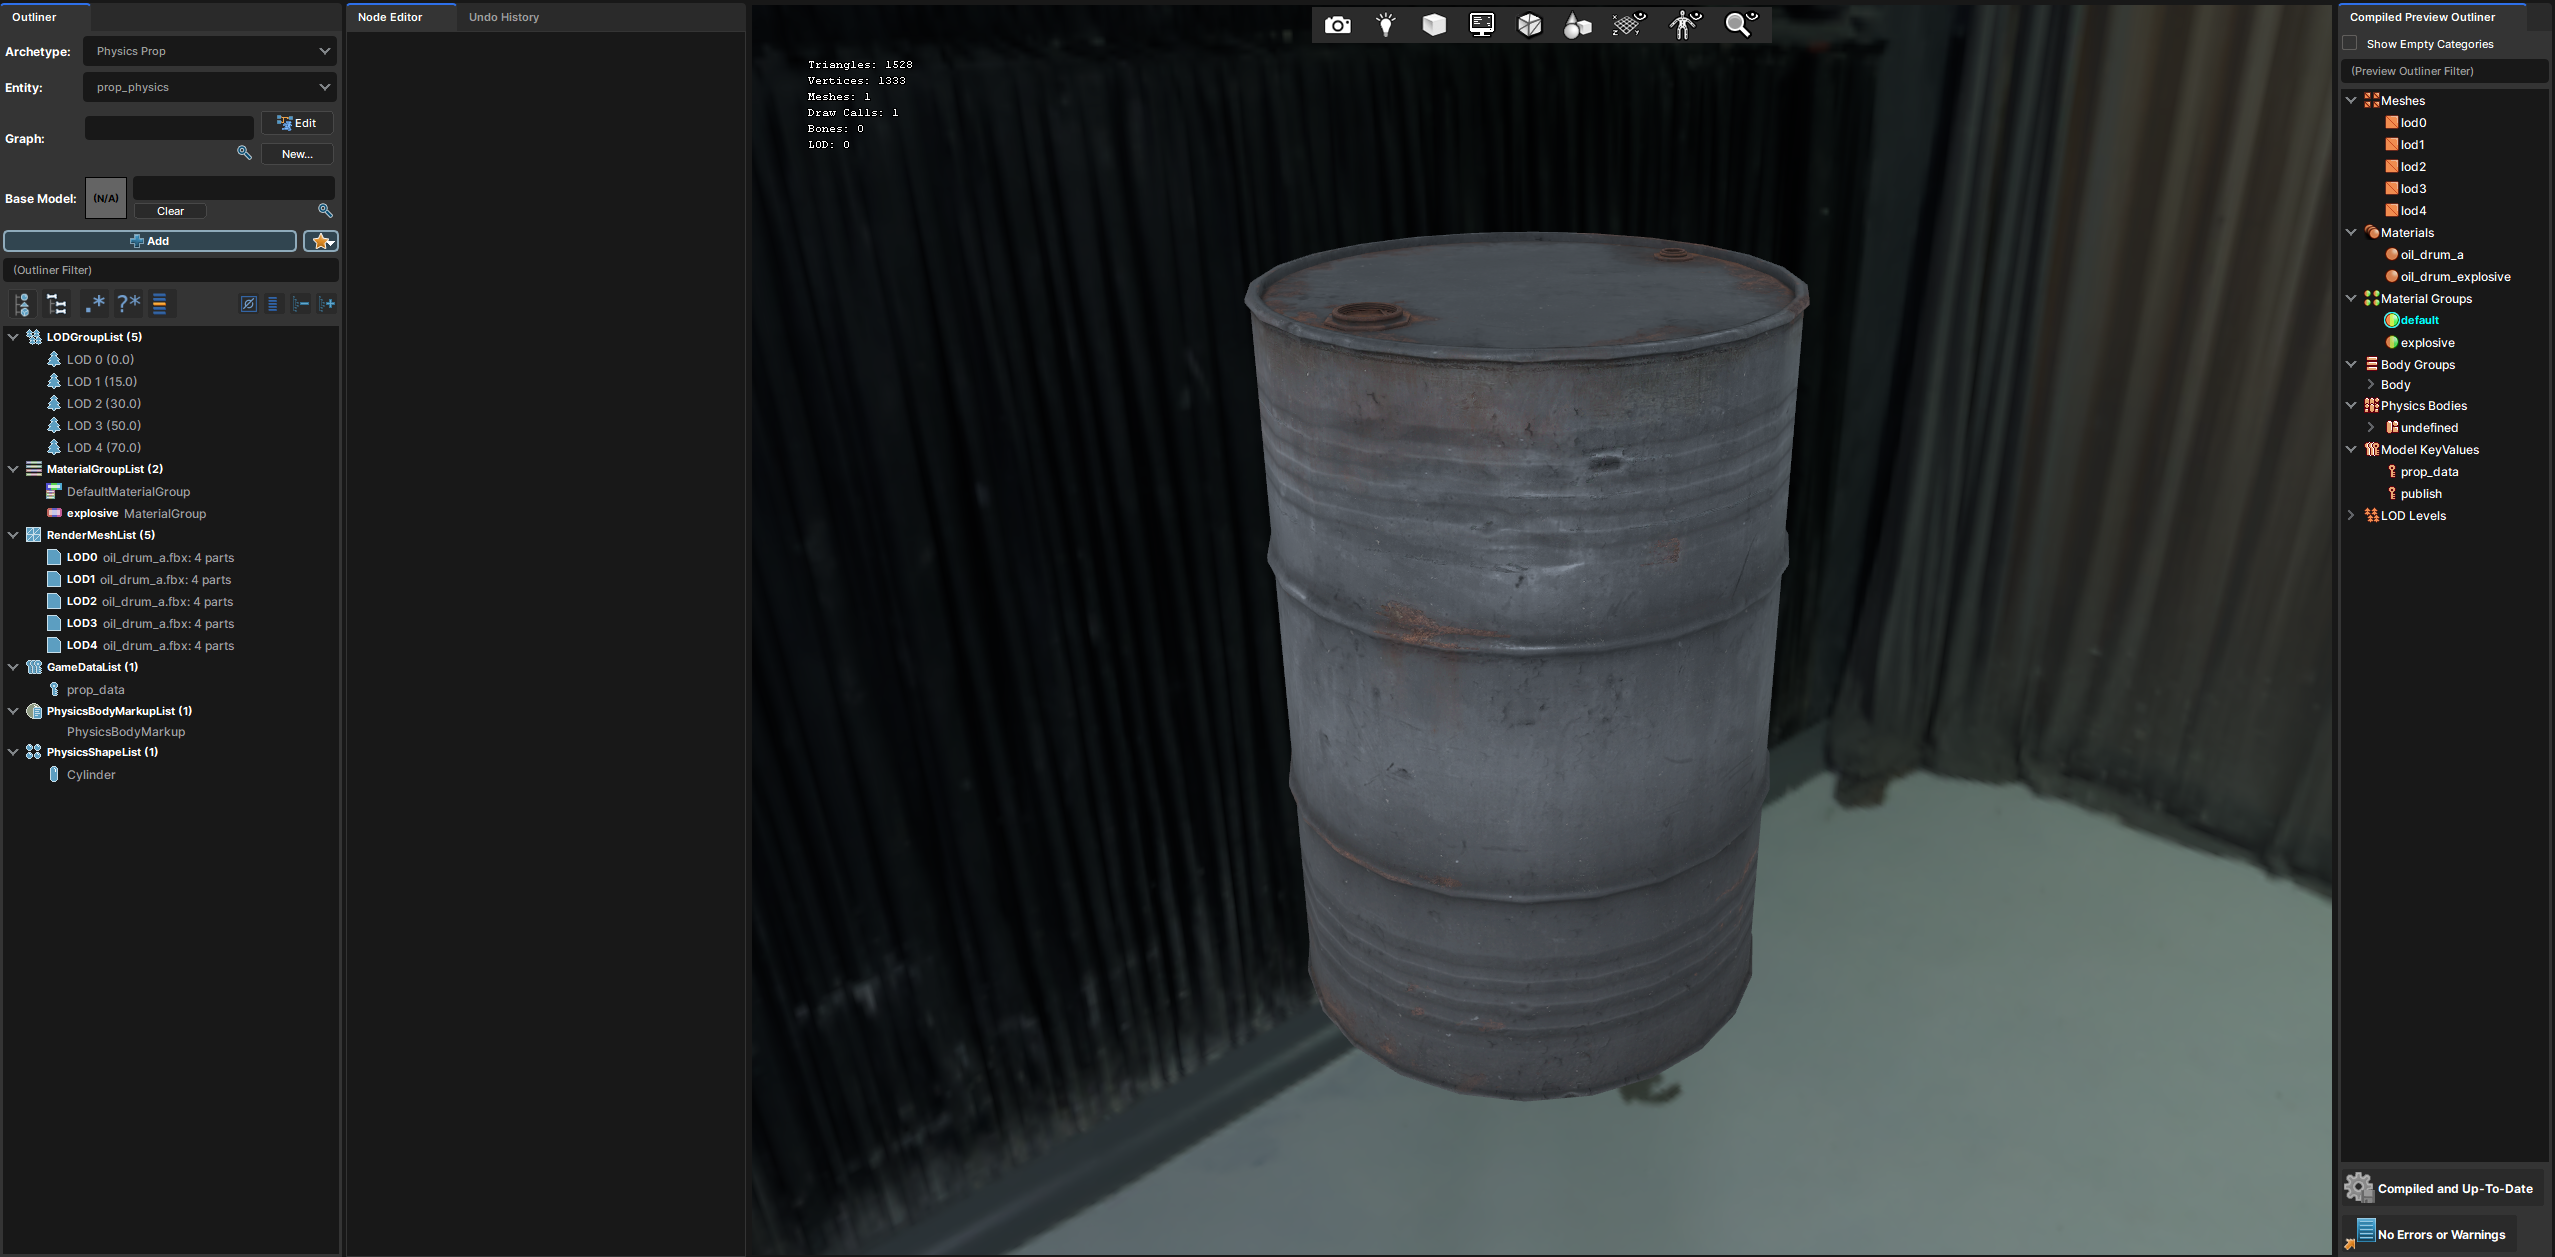
The main sections of the interface we'll worry about for this tutorial include the main Viewport, the Node Editor column to the left of that, and then the Outliner column to the very left of the screen. To add new Nodes, you can press either the blue +Add button and search, or you can right-click in an empty space within the Outliner and choose 'Add' from there. You can also right-click on the headers to get relevant node suggestions.
Rendermesh
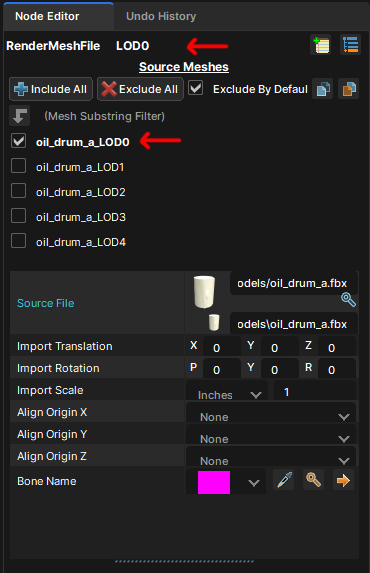
Selecting your .fbx under RenderMeshList in the Outliner will show you all the objects within your model, with tick boxes to control what is and isn't rendered. This is useful as we can use one .fbx to contain all of our LOD meshes, gibs and anything else we may want this asset to use.
Depending on your 3d package and export settings, you may need to mess with Import Scale and change the units to match your software, or export as the default for s&box which is Inches.
For the oil drum, I've selected just our LOD0 mesh and renamed this to LOD0 at the top.
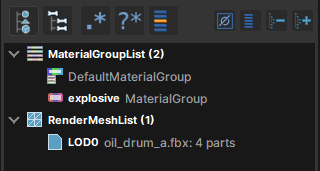
Material Groups
The DefaultMaterialGroup node exposes your models material slots. If your model has multiple material ID's, they'll be shown here, or you can tick the checkbox to override them and use a single material instead.
Skins By adding more Material Group nodes, we can make it so the model can switch between materials in-editor. Right-click on the MaterialGroupList header and choose Add MaterialGroup
Making any changes to your .vmdl will require you to Recompile. Just hit the 'Needs Compiling' button when prompted.
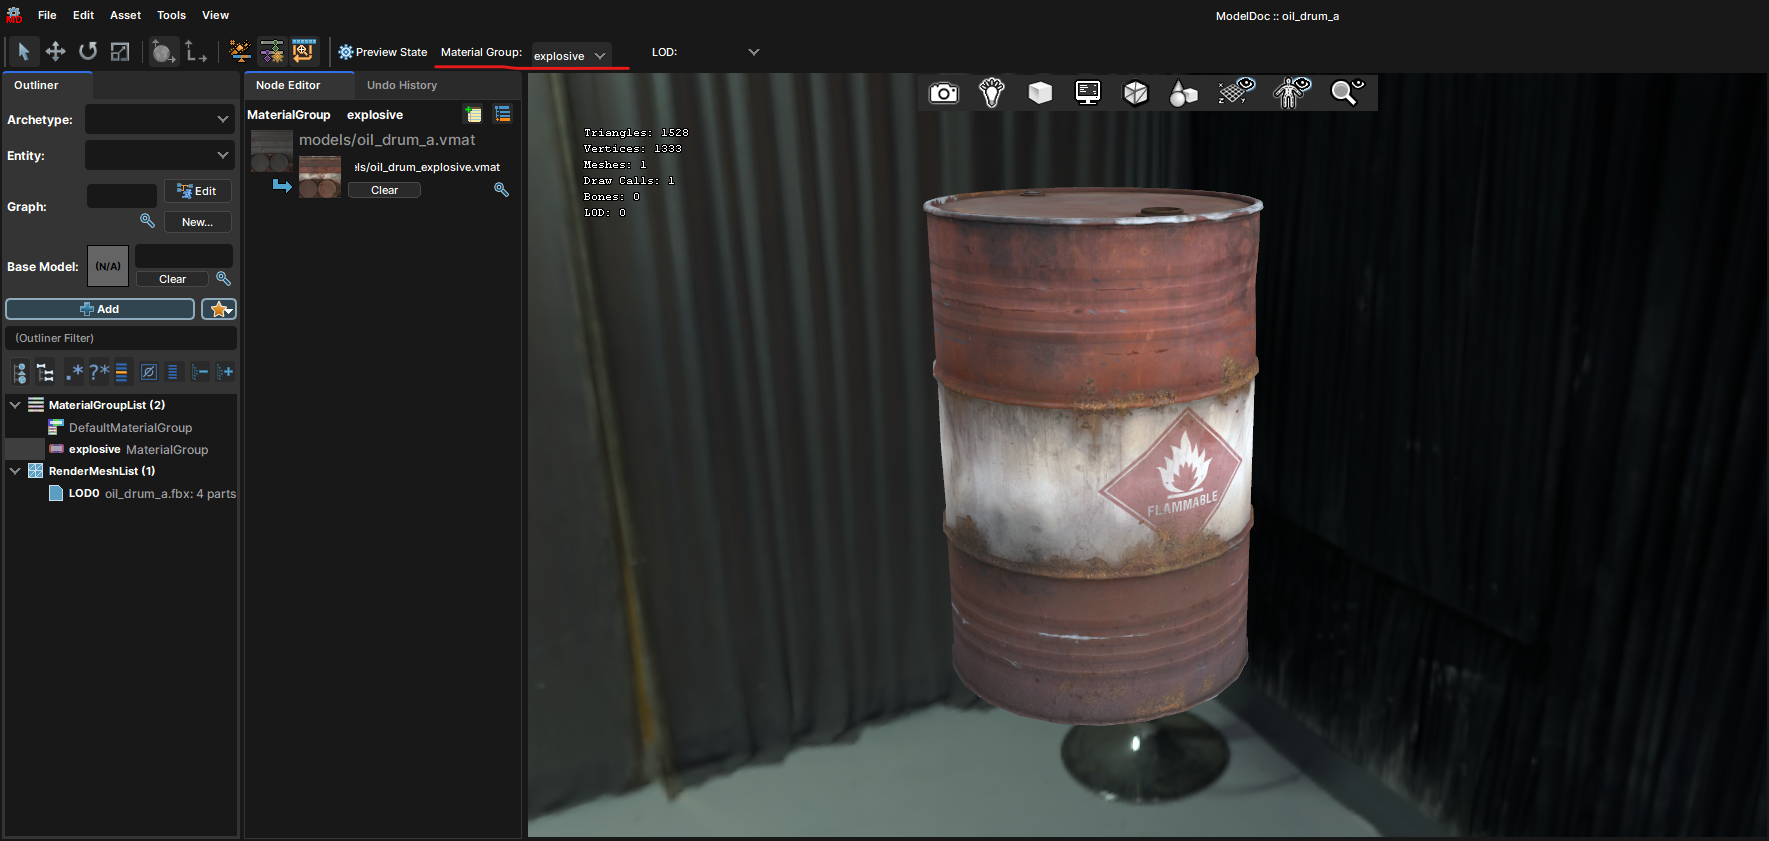
For this oil drum example, we'll add an explosive barrel material as an optional skin. You can preview this in the viewport by switching material group just above the Node Editor window on the top bar.
Collision
Primitives The easiest and least expensive method of adding collision to our models is by using primitives. We can do this by right-clicking the Outliner, choosing Add and then choosing one of the following nodes:
PhysicsShapeBox
PhysicsShapeCapsule
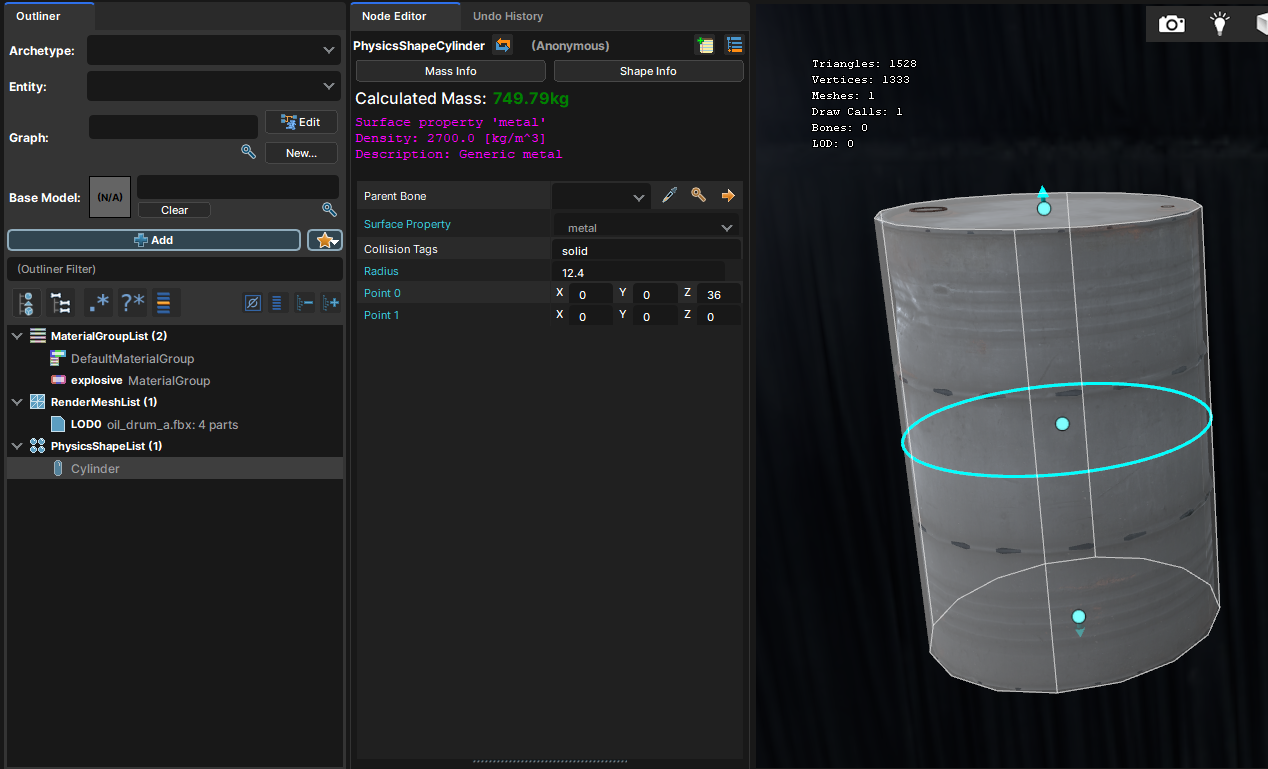
PhysicsShapeCylinder
PhysicsShapeSphere
When added, you get a gizmo in the viewport that lets you move it into place. Press Q to get the transform handles and T for an XYZ gizmo. You can also type values in manually within the Node Editor window.
You can also set the collisions Surface Property, which will determine the FX and sounds played when its walked on, hit, shot, etc. This setting will also determine the Calculated Mass of the collision mesh, which determines the final weight the object will be. We can override this later.A Cylinder physics shape is all we need in this oil drum example, but let's briefly look at the other most common methods of generating collision.
PhysicsHull Hull collision can be made using both of these nodes:
PhysicsHullFromRender - Directly references the visible geometry under RenderMeshList to generate a collision hull.
PhysicsHullFile - Point towards a 3D model file to reference in order to generate a collision hull. Useful for if you make collision meshes manually in your 3D software.
These give additional options to refine the generated hull, like Face Merge Angle, Max Vertices Per Hull and the option to generate hulls per mesh or per element.
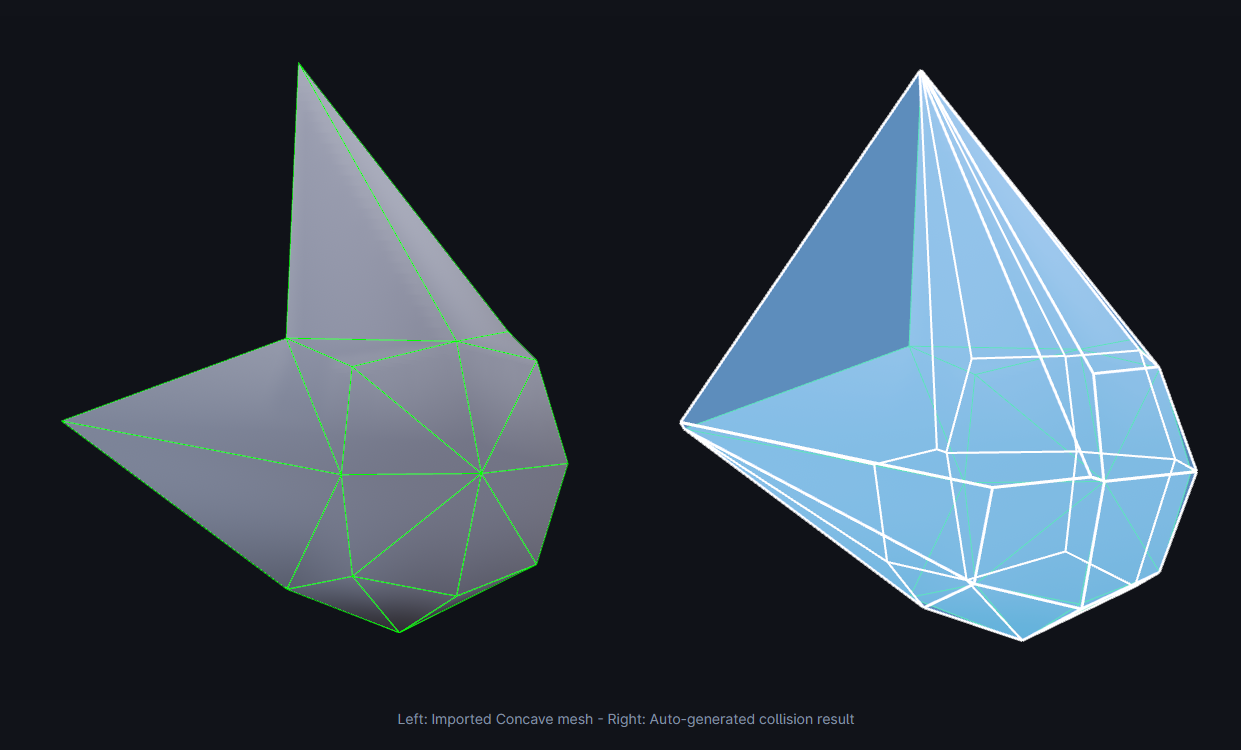
Collision generated this way does not account for concave meshes like shown below. PhysicsMesh Similar nodes to PhysicsHull collisions - they can render concave, however they have no simulated physics capabilities, static only.
Level Of Detail
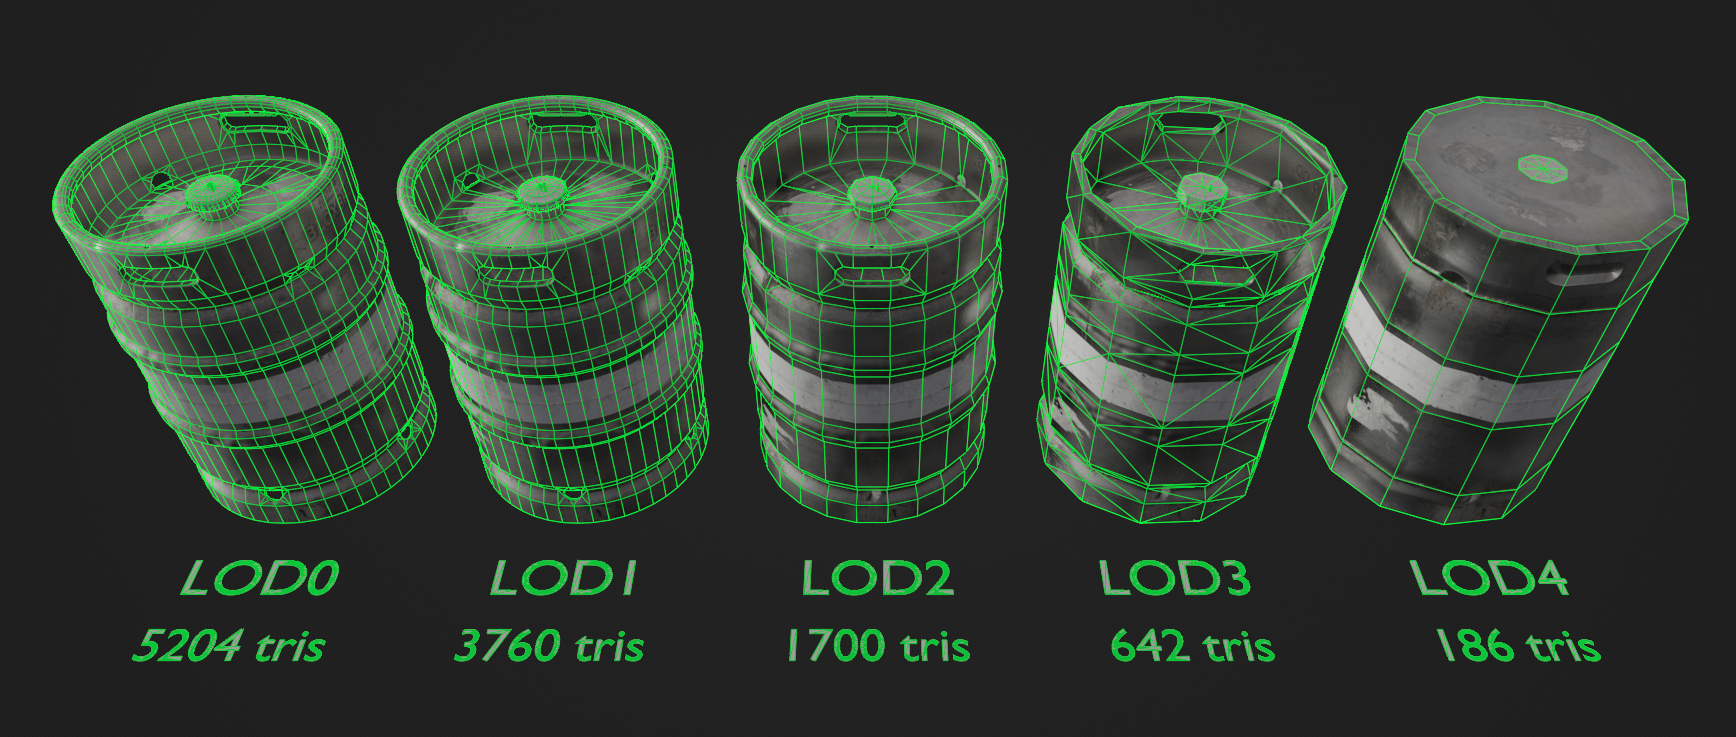
Level of Detail meshes (LODs) are increasingly decimated versions of your model that load in as the object gets further from the camera.
You can set this up two ways - use AutoLODs in ModelDoc to generate them automatically OR load in LODs from a 3d model file.
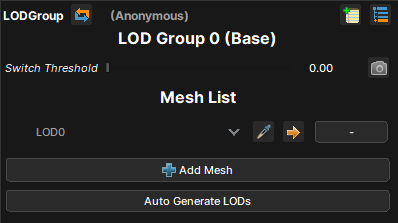
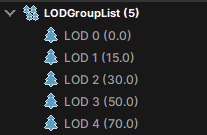
AutoLODs We're going to tell ModelDoc to use our current LOD0 mesh to generate lower detail versions for use as LODs.First we'll right-click the Outliner and add a LODGroup node. Click 'Add Mesh' and assign our LOD0 rendermesh, then we can press Auto Generate LODs. This will populate the LODGroupList and give us finer control over the decimation process for each LOD step. You'll want to make sure the Switch Threshold is at the lowest value possible per LOD step to where the transition isn't visually obvious. You can preview the LODs in the Viewport properly by selecting LOD: AutoLOD on the top bar.
And that's it!
Manual LODs made by hand usually give the best results and offer the finest control, but they take time.First, we need to make a RenderMesh per LOD Level. We can take our LOD0 RenderMesh from earlier and CTRL+D to duplicate it. We'll name each LOD appropriately and assign the corresponding meshes (LOD1 uses oil_drum_a_LOD1, LOD2 uses oil_drum_a_LOD2, and so on).
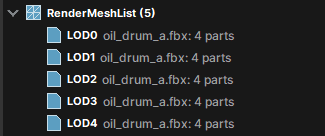
Next we need to add LODGroup to our Outliner, then click 'Add Mesh' and assign our LOD0 rendermesh. Then select the LOD 0 node and CTRL + D to duplicate it until you have one for each one of your RenderMesh LODs, in our case, 5. Then we'll go through each one and make sure it's pointed to the correct LOD rendermesh (LOD 1 uses LOD1, you get the idea).
Then we'll assign a Switch Threshold for each of those - as a starting point, I like to use:You can preview the LODs in the Viewport properly by selecting LOD: AutoLOD on the top bar. You should be able to zoom in and out in the viewport and it'll switch through the LODs.
Your LODs are now set up and working!
An easier way to verify this is working is to click the monitor icon at the top of the viewport and tick 'Rendering Info' to display the mesh info.
Markup
Markup nodes are used to overwrite mesh data with specific values.
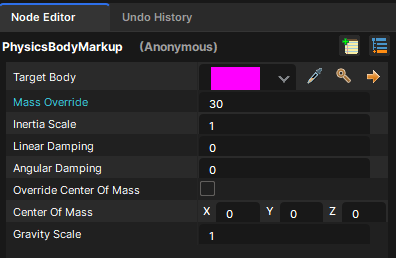
PhysicsBodyMarkupMass Override (kg) is the most common value to change with this node. To ensure accurate physics when interacting with the model, it's good to use accurate weight values. Without this PhysicsBodyMarkup node, it will default to the sum of the Calculated Mass values of all active colliders in the .vmdl, which is usually way too high.
eg. our oil drum collider is calculated at nearly 750kg, whereas a filled 55-gallon oil drum in real life is roughly 200kg, or 30kg empty.
Options like Linear and Angular Damping are great when considering the shape and material an object is and how it will move when flung around. Higher linear damping will increase air drag, whereas higher angular damping reduces rotation velocity.
Overriding Center of Mass can be useful for things like hammers where the head is significantly heavier than the handle, so the mass center is shifted higher up.
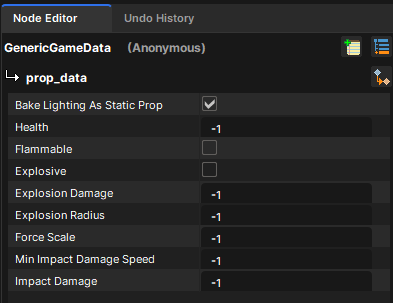
Prop Data
Prop Data nodes are necessary for physics props that need to be explosive, flammable or breakable (has gibs).
What We've Learnt
You should now be able to set up an asset in ModelDoc to include materials, LODs, collision, accurate mass and even gameplay properties!