Boolean, paint, and workspaces
v367690
5 September 2026
44 changes in this update
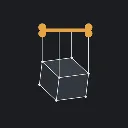
Boolean, on the Solid stage: union, subtract or intersect two bodies.
The engine's boolean has been working for a while, but it could only be reached by drawing a profile or drilling a hole - there was no way to point at two solids you already had and make them one.
Pick the tool body, pick the operation from the button's dropdown, and the tool is consumed by the cut. Keep tool bodies leaves it if you want to reuse it.
A Boolean refuses rather than guesses. A body cannot be its own tool, an unpicked tool is an error instead of quietly meaning "every body", and a subtract that removes everything or a union of solids that never touch each say so.
Painting. Press Paint and brush colour straight onto the model.
The paint composes over whatever material the part already wears, so a dropped material still shows everywhere you did not brush.
Strokes are saved in the .effigy file and replayed whenever the model rebuilds, so paint follows the part through later edits instead of smearing.
A workspace bar across the top: CAD, Sculpt, Paint, Rig.
The part of the pipeline you are in is a control now, rather than a word written small in the corner that you had to infer it from.
Each workspace opens the panels it needs and puts the rest away - Paint brings up the material browser, Rig gives the skeleton tree the whole right-hand side.
Whatever you rearrange while you are in a workspace is what you come back to.
Rigging has its own tool bar. Add Bone, Delete, Assign Body and Mirror sit on the Bones and Bind stages like every other tool, instead of being buttons in a side panel.
Rigs are saved in the .effigy file. Bones, their bind pose, their softness and which body is pinned to which bone all survive a save and reopen.
They did not before: placing bones and reopening the part lost every one of them, silently.
A part with no rig is written exactly as it was before, byte for byte, and still opens in older builds.
Soft bones are reachable. Select a bone, tick Soft in the Rig panel, and set its stiffness, damping, weight and cone.
Soft bones draw blue in the viewport so you can see which ones are simulated.
Preview on the Rig bar runs the solver live. Gravity pulls the soft bones off their pose so you can watch them sag and settle while you tune the numbers.
Dragging a bone with the pose gizmo makes everything soft below it swing behind the drag. Rest puts them back.
A tool that cannot run yet is dimmed and says why when you hover it, instead of looking live and doing nothing.
The tool bar marks which tools will use what you have selected. Click a face and Fillet, Chamfer, Draft, Hole, Face Material, Extrude and Move Face each get a green mark down their left edge.
Bones can be scaled in Marionette. The drag mode cycles Rotate, Move and Scale, and E still flips between the first two.
The scale is one number rather than three, because that is all a Source 2 bone carries. It keys like any other channel and plays back at runtime.
Shift-click builds a selection of bones instead of replacing it, and the group gets one gizmo at its centre that moves them together.
A Handle Size slider scales the bone dots and the areas you click to grab them, so a dense hand rig can be shrunk until its fingers stop overlapping. It is remembered between sessions.
The built-in Effigy tutorial builds a house rather than a lamp, in five steps: box walls, a wedge roof, holes drilled for the windows and the door, then the export.
Every step is a shape you can see arrive. The lamp asked you to sketch, revolve, shell, subdivide, unwrap and sculpt before you had made anything you could look at.
The pull handle is a single arrow now, pointing the way the face faces. Two of the old three did nothing when dragged, which reads as broken.
Sliding a wall sideways is Move Face's Translate mode.
Only one thing can own a click in the viewport. Sketching, sculpting, painting and the bone tool could each be armed at once, so a click tried to do two things.
Bones can be clicked in the viewport. They never could: every bone shared one click target, so the hit test knew the cursor was over a bone but not over which one.
A bone's hit target is the bone you can see. It used to be a fixed size while the drawing scaled with length, so a long bone was mostly dead and a short one stuck out past its end.
The pose gizmo stops vanishing when you click the bone it belongs to.
Hovering a bone highlights the bone, rather than putting a blob at one end of it.
Picking a bone in the Rig tree turns it yellow in the viewport straight away, instead of waiting until you happen to move the mouse.
In the Rig workspace the model's faces are no longer selectable, so a click meant for a bone cannot land on the wall of triangles behind it.
A rig edit marks the document unsaved. Closing the window used to close it cleanly without asking, and the whole rig went with it.
Undo works on soft bones. Making a bone soft and pressing Ctrl+Z left it soft, and changing a stiffness twice lost the first value.
An oversized fillet or chamfer is refused again across the whole range where it should be. On a 2-unit cube, radii between about 1.0 and 1.25 used to come back quietly self-intersecting.
The suggested radius the error offers no longer proposes a size inside that broken band.
Paint is as fine as the mesh it lands on. A bare box paints as a few colour blobs; add a Subdivide or Sculpt above the Paint feature and the same brush gets as fine as the mesh.
A painted model writes its colours into the DMX, and the whole chain up to that file is checked on every test run - the strokes replay, survive an edit underneath them, and come back identical after a save and reopen.
What is unchecked is the far side of the compile: nobody has looked at how the engine's shader composites those colours. Check a painted model renders its paint before relying on it.
Paint tints the material rather than covering it. Paint that fully replaces the colour under it needs a shader.