Planes you place, and paint you can see
v368962
9 September 2026
38 changes in this update
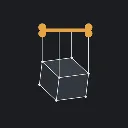
Planes you place yourself. A Plane button beside Sketch, so "which plane?" is no longer answered only by Top, Front, Right or a face that already exists.
Build one off a global plane, off a face of a part, or off another plane, then push it along its normal with Offset and lean it over with Angle.
Drag a plane instead of typing its offset: an arrow stands on it, and everything drawn on the plane follows as it slides.
A plane built from a face rides that face -- make the part taller and the plane moves up with it.
Planes stack, so three ribs ten apart are each "ten further on" -- change the bottom one and the rest follow.
Sketch on one the way you sketch on anything else: press Sketch, click the plane.
Planes are drawn in the viewport with their names beside them, and each has an eye in the feature tree.
Paint is a texture now, not vertex colour. A stroke goes into a 1024x1024 canvas, so a bare box paints at brush resolution with no Subdivide first.
A painted part exports its own material. Compile .vmdl writes the canvas to a PNG, wraps it in a .vmat and binds it to the part.
Entering Paint on a part whose UVs will not hold paint inserts a UV Project above it automatically, and says so. It undoes with one Ctrl+Z like any feature.
A material brush. Press Material in the Paint workspace and drag on the model to lay a material onto faces instead of picking them one at a time.
The brush uses whatever is selected in the Materials browser, so you can brush one on, click another and keep going without leaving the model.
It outlines the faces it is about to take, because a material belongs to a whole face: on a coarse box a small ring still paints an entire side.
Bones can be placed inside a model, not just on its skin. Middle is the default: a click puts the joint halfway through the material under the cursor.
So a spine runs down the middle of a chest instead of down the front of it, which is where a joint has to be for the weights around it to make sense.
While placing, the run of material being measured is drawn with its thickness, so you see where the joint will land before you click.
A Y=0 toggle forces every placed joint exactly onto the mirror plane, so a chain placed with it on mirrors cleanly.
A Falloff dropdown on the sculpt bar: Smooth for a soft mound, Sharp for a hard crease, Linear for an even fade, Constant to move the whole disc at once.
Hold Ctrl while sculpting to invert the brush -- Draw carves in, Inflate deflates, Grab drags the opposite way. The ring turns red so you can see it before you click.
Sculpting hotkeys: 1-6 arm the six brushes, X mirrors, M masks, and [ and ] shrink and grow the brush.
Rebind any Effigy key. Settings has a Hotkeys section listing every key the tool registers -- click one, press the new key, and it takes effect immediately.
Rebinds live in the engine's own shortcut store, so a change here also shows up in the editor's Editor Keybinds page, and the other way round.
A UV checker view toggle, in Settings under View. Stretching and seams show on the surface instead of waiting for a paint or a bake to smudge them.
An unwrap now says what it did -- how many charts, how many faces, and the texel density -- and warns when the result still will not hold a bake.
The settings window folds up. Every section is a header you click to collapse or expand, and it remembers which ones you had open.
Paint is visible. It never was: the colours went into the mesh's vertex colour stream, which the shader everything renders with does not read, so a painted part looked exactly like an unpainted one.
Paint is no longer limited by the mesh. A stroke used to land on the corners of a box and spread across whole faces; it now resolves as finely as the canvas whatever the mesh.
A held brush no longer keeps darkening. Re-stamping the same spot over and over stays the same mark.
A material you dropped on a face still wins on a painted part -- paint takes the slots that had nothing.
A compiled model arrives wearing a material instead of the bright red missing-material shader. Every slot the mesh uses is named now, the rest pointing at materials/default.vmat.
A painted part compiles to its paint, the way any texture survives a compile.
A compiled static model samples its texture the right way up. The OBJ exporter was writing V unflipped, so a painted or textured static model came out upside down.
Materials from the browser bind to something that exists. Dropping a compiled .vmat_c used to write a reference nothing resolves, and the face came back bright red.
The same cause made a part wearing oak.vmat take a second slot for oak.vmat_c. It recognises them as one material now.
Dragging a multi-bone selection in Marionette no longer moves one bone twice as far as the rest.
Switching workspaces now puts away what you were doing. The note pen no longer stays armed into the next thing you draw, and a running soft-bone preview stops.
A plane's dialog no longer puts the face pull arrow on the model. The plane's own offset arrow is the handle there.
Animation clips have to be added again every time you open the tool. The list File > Animation Clips... builds is not written to the .effigy, so add the clips in the same sitting you compile in.