Push and pull the faces of a part
v367420
4 September 2026
37 changes in this update
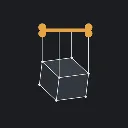
Faces of a part can be extruded. Click a face of anything on screen, press Extrude, and it pulls.
No sketch is involved and none is asked for, so it works on a part built entirely out of primitives.
Taper, Up to next, Through all, a second distance and New body all work from a face exactly as they do from a sketch profile.
A plain pull moves the face rather than growing a boss on top of it, so the part stays one clean solid you can still Shell afterwards.
Move Face, a new tool on the Detail stage.
Offset pushes each picked face along its own normal, so picking both sides of a wall makes it thicker or thinner.
Translate moves them together, so the wall slides and keeps its thickness - material added on one side and taken from the other.
The distance can be dragged instead of typed. Open Extrude or Move Face, pick the faces, and a set of arrows appears on them.
The arrows are turned to the face rather than to the world, so the blue one is always straight out of it.
Pull it and the solid grows under the cursor, with the number in the panel counting up as it goes.
Dragging only ever sets the open tool’s distance. It never adds a feature behind your back, and the arrows are gone the moment the tool is closed.
The Profiles box in the Extrude panel picks faces. Hover one, click it, and that is your profile; click it again to take it off.
Sketch regions are still pickable in the same box at the same time, and a sketch in front of a face gets the click.
Right-click a face and every tool that can use it is on the menu: Sketch, Fillet, Chamfer, Shell, Draft, Hole, Subdivide and Face Material.
Each of them opens already pointed at the face you clicked.
Moving a face refuses rather than guesses. A face that is not flat, a face moving while a flat neighbour stays put, or a move far enough to turn the part inside out each say which it was and what to do instead.
The panel no longer says "No sketch yet - add a Sketch first" at a part that has faces you can point at.
That message appeared whenever the document had no sketches, which is the normal state of a part built out of primitives.
It now says what you can click, and the box stops being red once a face answers it.
Revolve, Sweep and Loft still ask for a sketch, because a face is not something they can use.
The line under the viewport that tells you what your selection is good for now asks the tools instead of reciting a list somebody typed.
Subdivide asks which part you mean instead of taking the whole document.
Click a part in the Parts list and you get that part entire, or pick faces in the viewport and you get those.
The grease pencil’s colour picker is folded into the pen button itself - click the pen to draw or put it down, open its dropdown to change colour.
The eraser works like the sketch Cut tool: hold the left button and drag through the notes you want gone.
The Edit menu is shorter and reads in groups instead of as one list of fifteen.
The five sculpt-mask commands are behind a single "Sculpt Mask" submenu.
The three "Normal Map:" toggles move to Edit > Settings under "Normal map bake", as switches and a size dropdown, and are remembered between sessions.
Chamfered and filleted parts measured smaller than they are.
The little triangles that cap each corner were being built inside-out, so they subtracted from the enclosed volume instead of adding to it. A chamfered 1-unit box measured 0.811 against a true 0.883.
Nothing looked wrong because nothing was wrong to look at - the mesh was closed, valid and the right shape, and only the numbers taken off it were out.
Those numbers are what collision hulls and physics are built from.
An oversized fillet or chamfer is not always refused any more.
The check that catches "the blends have met through the middle" measures enclosed volume, and some of what it used to catch it was catching only because of the inside-out corners fixed above.
On a 2-unit cube a fillet radius between about 1.0 and 1.25 now builds a part that is quietly self-intersecting instead of saying so. Below and above that band it still refuses correctly.
A compiled model arrives with no material on it, and renders in the bright red missing-material shader until you assign one by hand.
The geometry, the UVs and the skinning are all fine - it is only the material reference that does not survive the compile.