Top-down 2D player movement and sprite animation tutorial
A beginner friendly walk through for making a simple top down 2D player in s&box. This will include 2D movement, a camera follow script and setting up 2D sprite animations with sprite sheets.
What you will build
A player that moves with WASD keys
A camera that follows the player as they move.
Idle animation when standing still and running when moving.
Prerequisites
A new and empty game scene or project
An idle and running animation sprite sheet. The one that I am using in the tutorial can be found here.
Very basic understanding of the editor e.g. what scenes are, how to create entities, the hierarchy view etc.
Very Basic understanding of animations.
1. Setup 2D scene
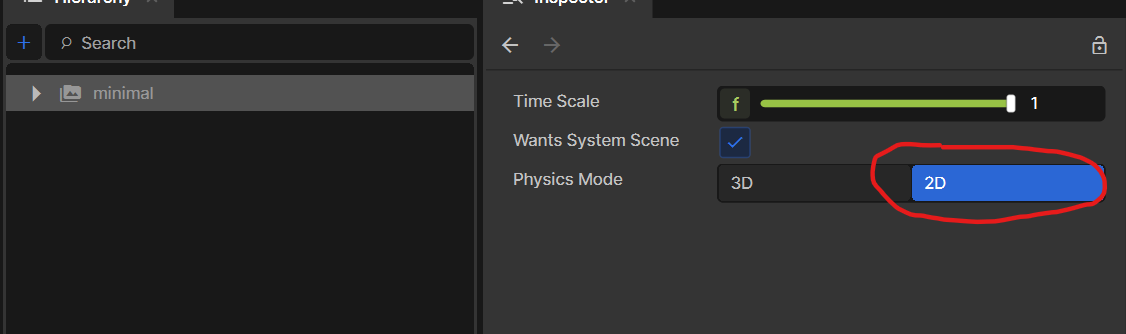
Open or create a new scene. In the scene settings, set physics mode to physics2D.
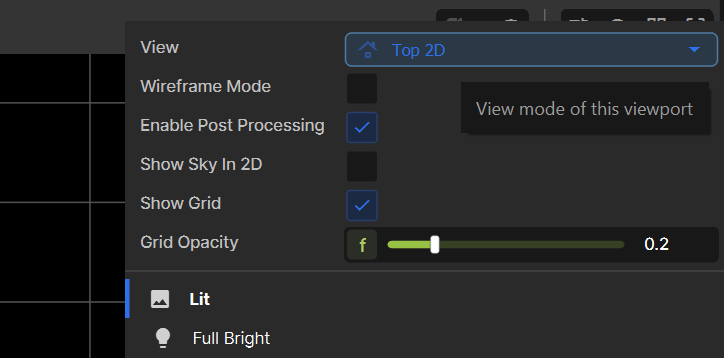
Set the editor view mode to Top 2D, this will allow us to correctly observe our game in the scene view. (The sliders icon button in the top right corner above the editor view)
Add the following to your scene:
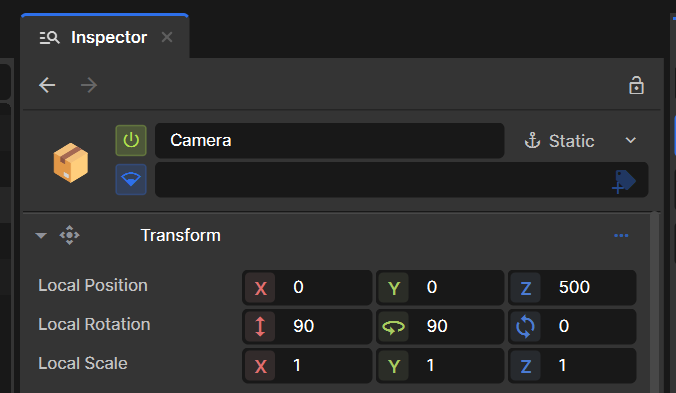
A Camera object and set its X and Y position to 0. Z position to 500. The X and Y rotation to 90 and Z rotation to Z. . This will ensure camera is facing our player.
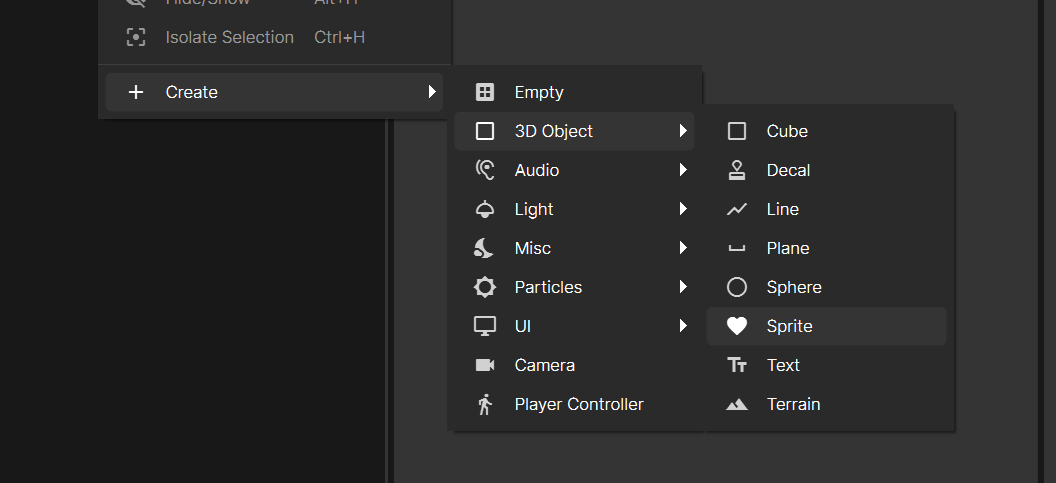
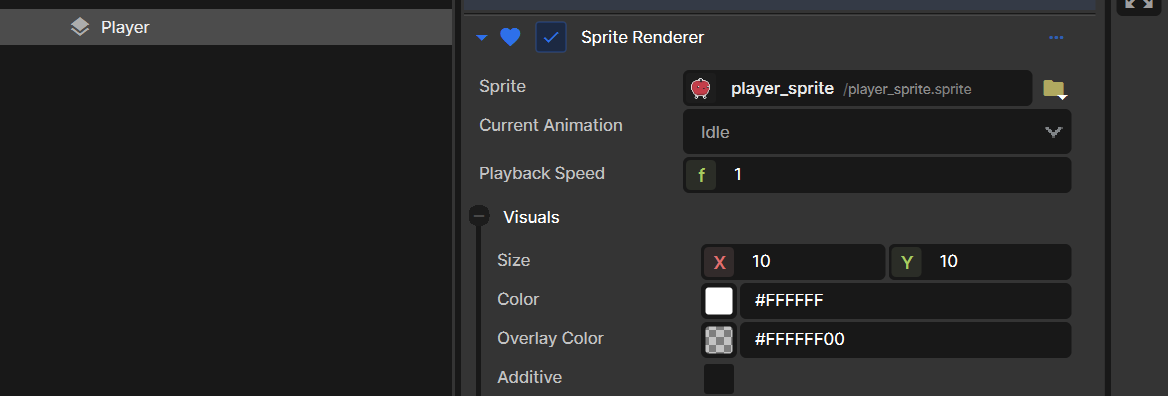
A Player Game Object with a Sprite renderer.
Once we have done this we should expect to see our sprite in the center of our game screen when we press play.
2. Setting up sprite animations
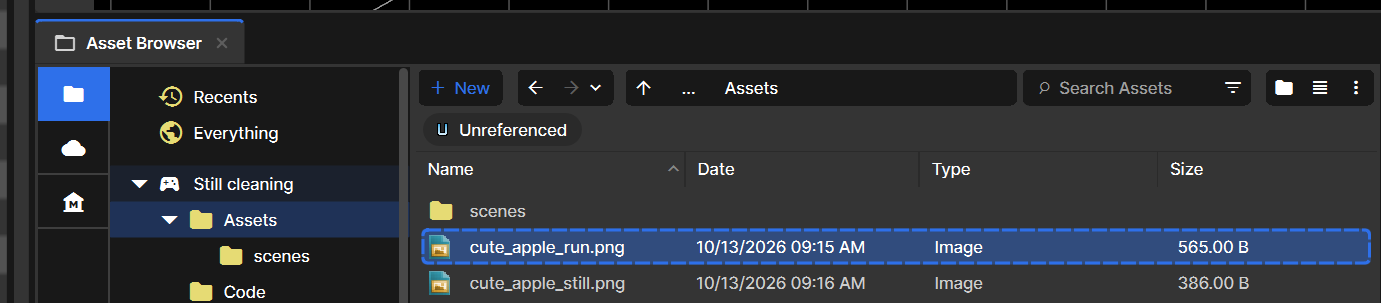
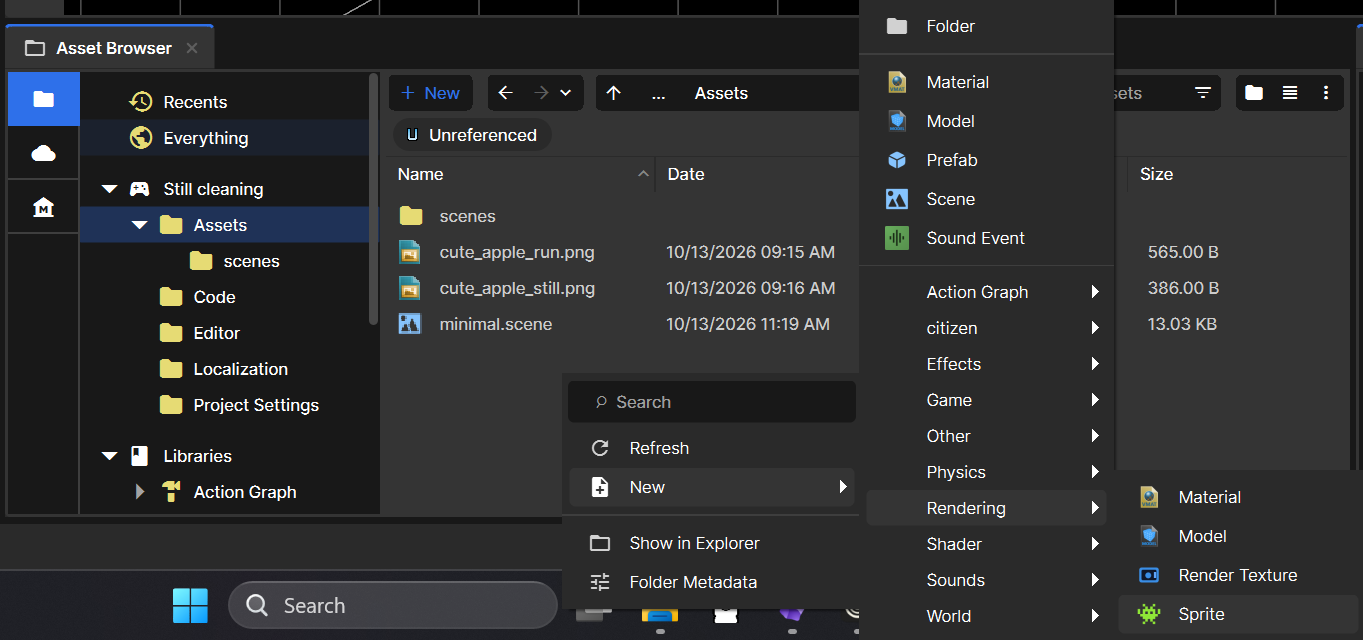
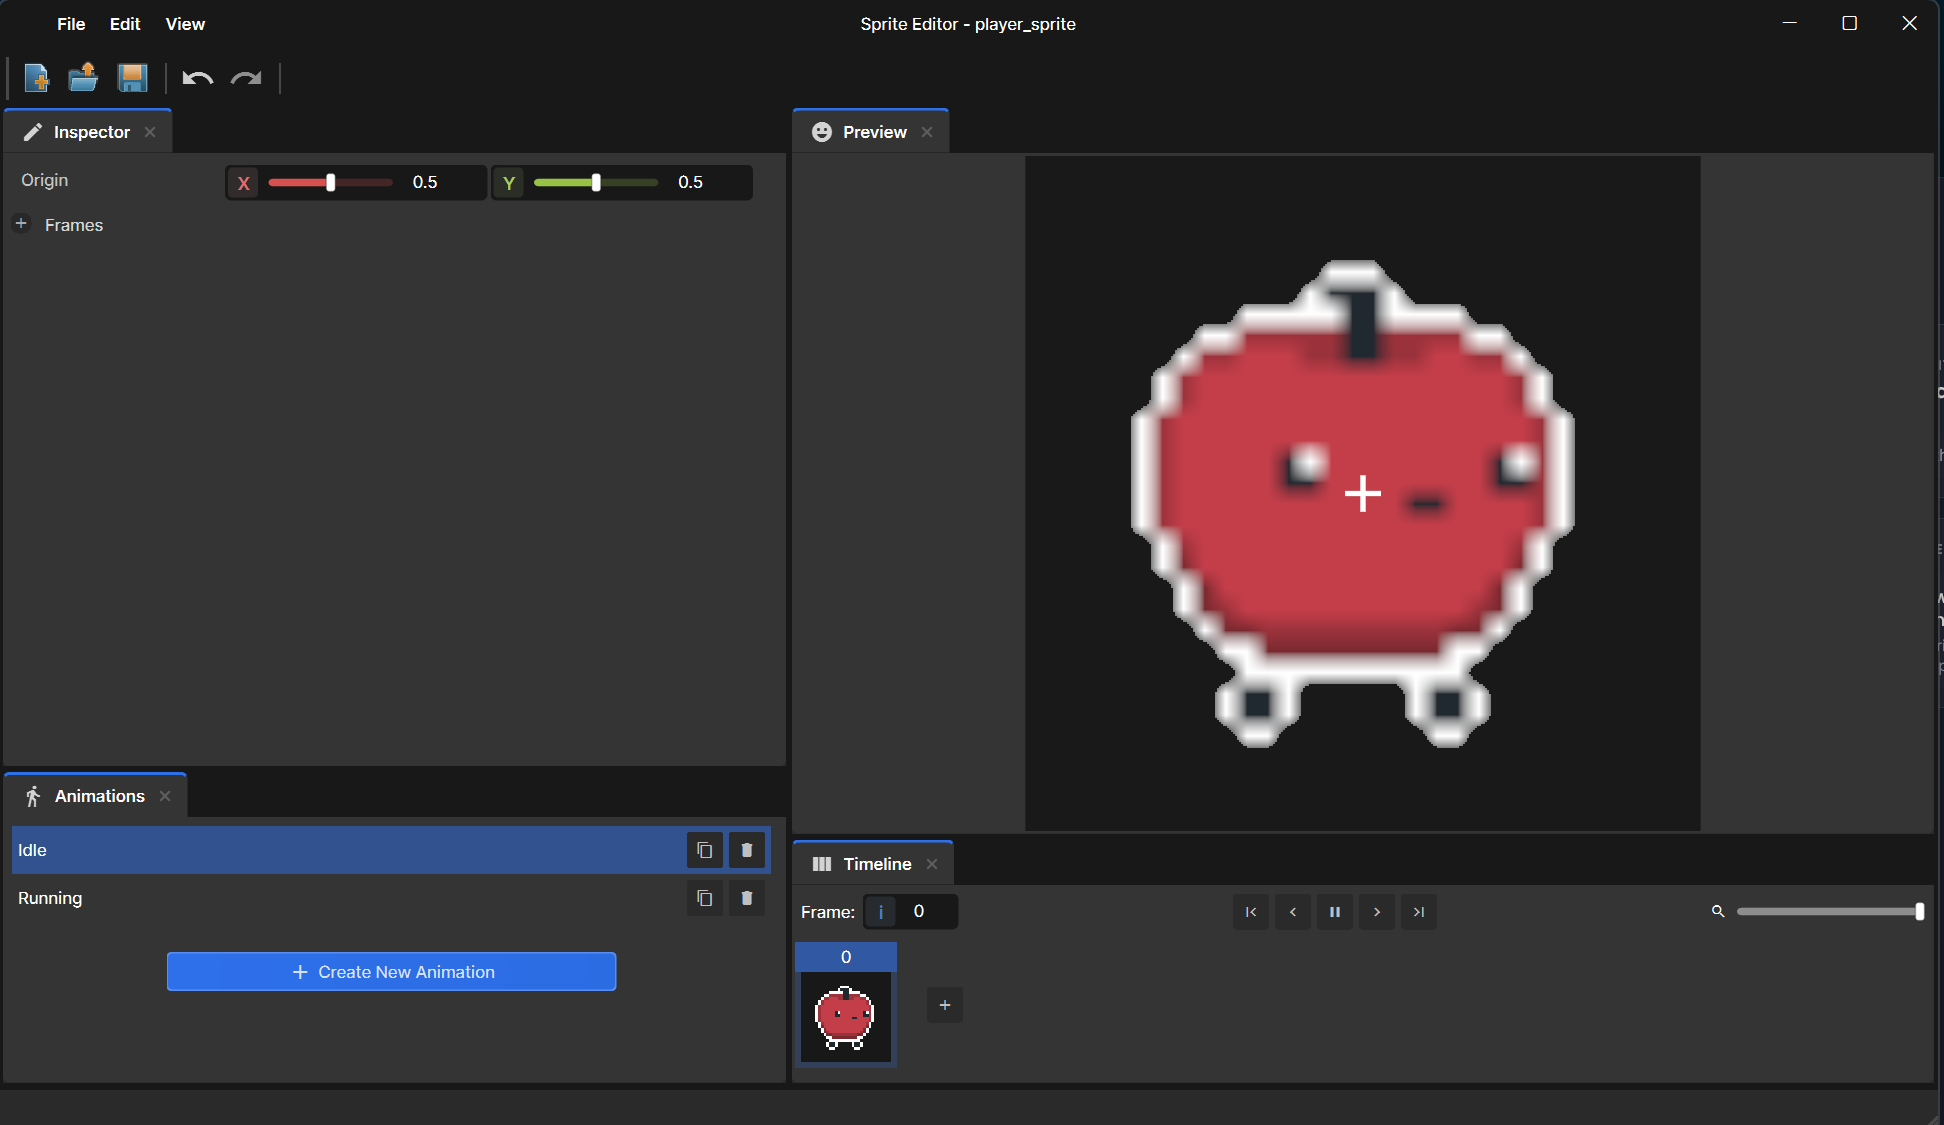
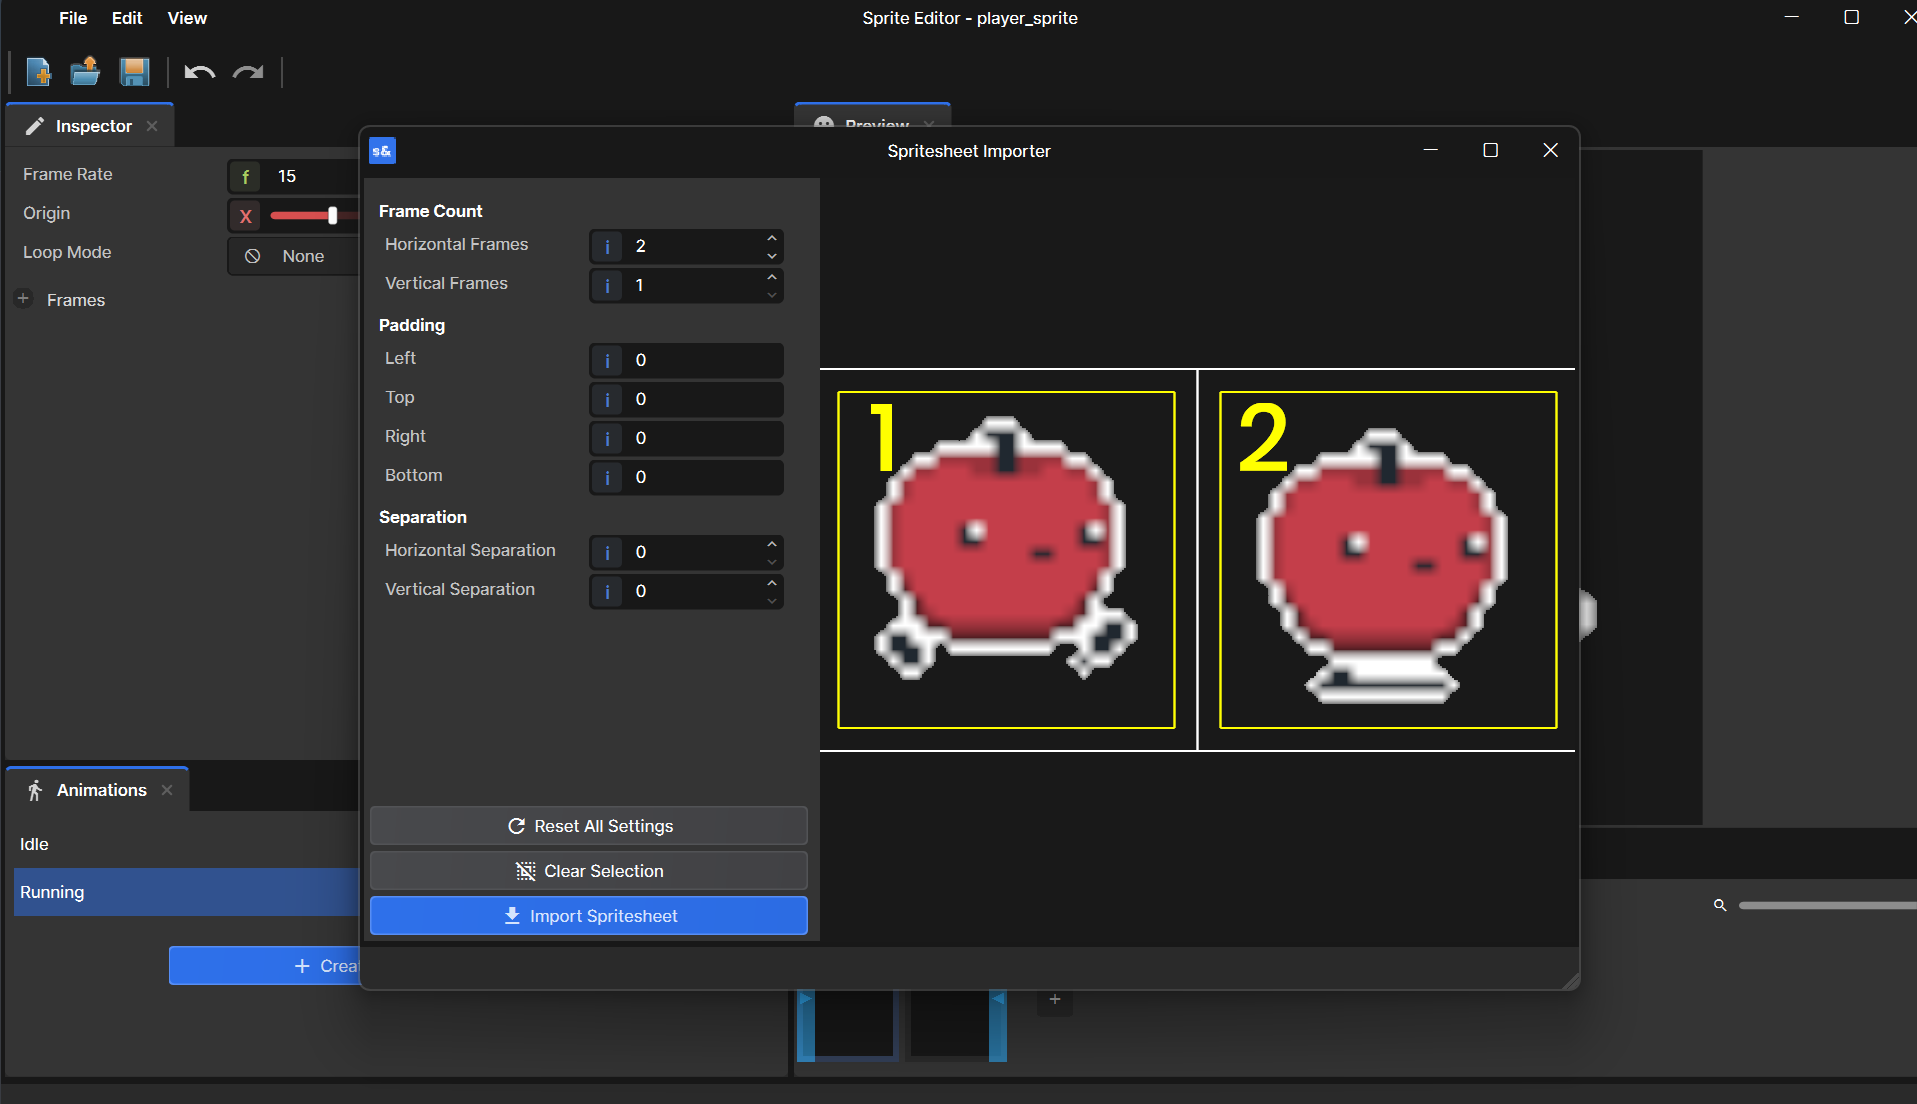
Drag and drop your two sprite PNG's into the asset folder. Name them accordingly I have one for our run and another for the idle animations. Next create a Sprite object inside our asset folder. This can be done by right clicking > Rendering > Sprite. This will be used to store and control our sprite sheet animations. Name it player_sprite or anything you like. Once created, open the sprite by double clicking on it then create two animations one called Idle and the other running. For the idle click the plus button underneath frame then click import image and select your Idle PNG file from the assets folder. You should see the following once selected: Then do the same for the Running animations except import as a sprite sheet. You should see the following when doing so.
Once this is complete your can then save these changes and then drag and drop this new sprite we have made into our Player Sprite Renderer. This will replace our existing default image we had. Note: If you are using pixel art like mine, be sure to set the Texture Filter on the players Sprite Renderer to Point. This will remove the blurring effect.
3. Setting up camera follow controller
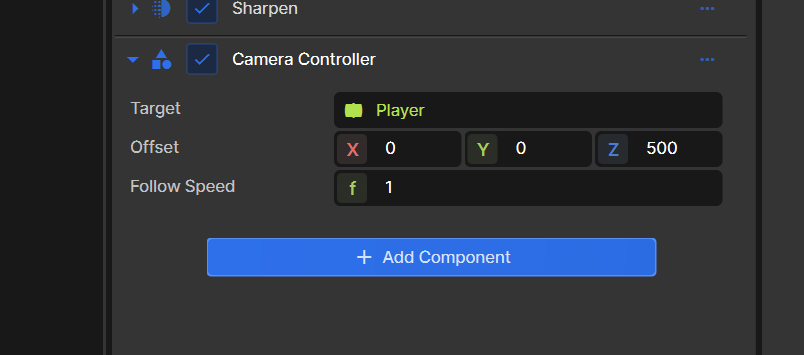
Add a new component to our Camera object called CameraController. Once created please open the file and add the following code:
using Sandbox;

public sealed class CameraController : Component
{
    [Property] public GameObject Target { get; set; }
    [Property] public Vector3 Offset { get; set; } = new Vector3( 0f, 0f, 500f );
    [Property] public float FollowSpeed { get; set; } = 4f;


    protected override void OnUpdate()
    {
        var desired = Target.WorldPosition + Offset;
        WorldPosition = WorldPosition.LerpTo( desired, FollowSpeed * Time.Delta );
    }
}
Then in the inspector click and drag our Player object onto our Camera's Camera ControllerTarget property.
This will allow us to follow the players movement to avoid the player going off screen.
4. Setting up player movement
Add a new component to our Player game object called PlayerController . Once create please open the file and add the following code:
using Sandbox;

public sealed class PlayerController : Component
{
    [Property] public float MoveSpeed { get; set; } = 200f;

    private SpriteRenderer sprite;


    protected override void OnStart()
    {
        sprite = Components.Get<SpriteRenderer>();
    }

    protected override void OnUpdate()
    {
        var input = Input.AnalogMove;

        var moveDirection = new Vector3( -input.y, input.x, 0f );

        var moving = !moveDirection.IsNearZeroLength;

        if ( moving )
        {
            WorldPosition += moveDirection.Normal * MoveSpeed * Time.Delta;
        }

        if ( moveDirection.x < 0 )
        {
            sprite.FlipHorizontal = true;
        }
        else if ( moveDirection.x > 0 )
        {
            sprite.FlipHorizontal = false;
        }

        sprite.PlayAnimation( moving ? "Running" : "Idle" );
    }
}
This will allow our player to move with WASD keys, our sprite to play the animations we set up based on its movement and flip our sprite horizontally based on its direction.
5. Play test
Once all the above is complete you should have a player running around the screen. You should see the following, if you don't, then review the previous steps or send me a message on discord @barnyard6294 for some help.
I'm planning to try make 1 tutorial per day, I know that a lot of new people have issues with the lack of tutorials and documentation. So hopefully this make it easier for new people to get straight into it but also avoid just AI slopping it out.
I really like the s&box platform so I'm hoping creating a lot of tutorials that will assist in the success of s&box thus a good investment of my skills.
Please give me feedback on the tutorials, any is appreciated thanks.