Menu Scene
Your game can have its own main menu. When someone picks your game in s&box, it loads straight onto your menu scene - your title screen, your background, your buttons - with the platform dock along the bottom so they can still switch games.
Without one, players get a default page made from your Workshop item, and your game isn't loaded until they hit play.
This is part of the new platform menu, which is opt-in for now - menu_platform 1, or Settings > Game.
Setting it up
Make a scene for your menu, then pick it in Project Settings > Game Setup > Menu Scene.
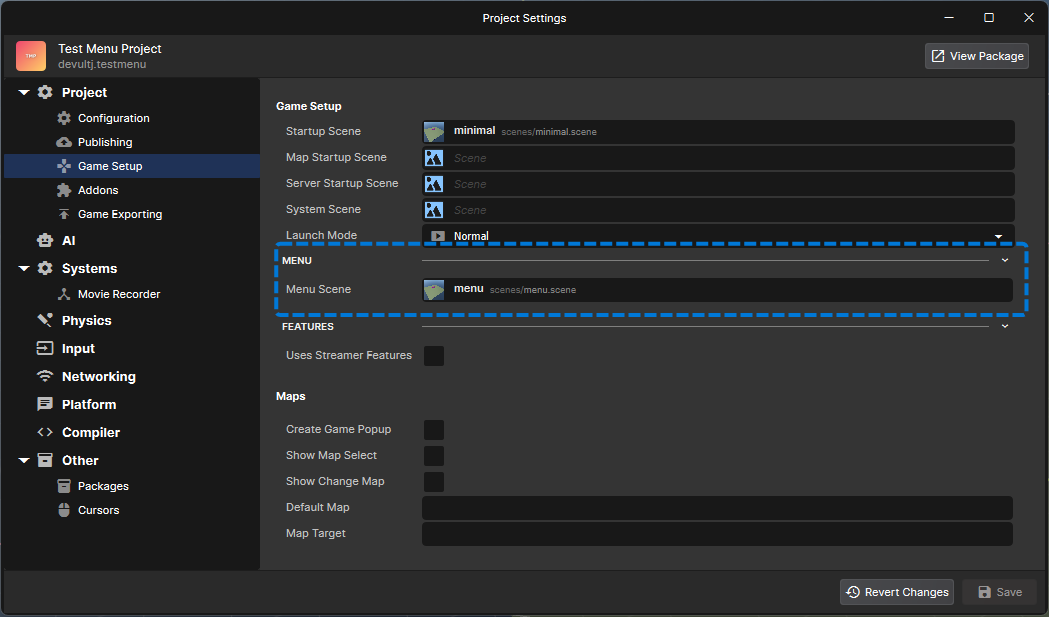
It's just a scene. Put whatever you want in it - a camera, some props, a ScreenPanel with your UI. Your System Scene is loaded into it too, like any other scene.
Starting the game
Change scene. Any scene that isn't your menu scene starts the game.
public sealed class MainMenu : Component
{
	[Property] public SceneFile GameScene { get; set; }

	public void Play()
	{
		Game.ChangeScene( GameScene );
	}
}
You pick where to go, so you can have more than one button - a singleplayer scene, a multiplayer one, a tutorial.
Your Startup Scene is still used when the game's launched some other way, like with a map, or with the platform menu off.
Lobby, map and settings
Your menu is where players pick how the game starts. Fill in LaunchArguments before you change scene, and the game picks them up.
public void Play()
{
	LaunchArguments.Map = "facepunch.flatgrass";
	LaunchArguments.MaxPlayers = 16;
	LaunchArguments.Privacy = LobbyPrivacy.FriendsOnly;
	LaunchArguments.ServerName = "My Server";

	Game.ChangeScene( GameScene );
}
Lobby
Make your lobby the same way you always have. Networking.CreateLobby uses MaxPlayers, ServerName and Password from LaunchArguments over what's in your LobbyConfig. For Privacy, the more private of the two wins.
If you create it from somewhere that also runs on the menu, like a GameObjectSystem, skip it there:
void ISceneStartup.OnHostInitialize()
{
	if ( Game.IsOnMenu ) return;

	Networking.CreateLobby( new LobbyConfig { MaxPlayers = 32, Name = "My Game" } );
}
Map
LaunchArguments.Map is a map's ident. A MapInstance with Use Map From Launch on loads it, so point your button at a scene with one of those in it.
Game settings
Your game's already loaded on the menu, so set your ConVars straight away:
[ConVar( "mygame.friendlyfire", ConVarFlags.Replicated | ConVarFlags.Server | ConVarFlags.GameSetting )]
public static bool FriendlyFire { get; set; }
ConsoleSystem.SetValue( "mygame.friendlyfire", true );
They're replicated, so anyone who joins gets them.
Going back
Game.ReturnToMenu();
This takes you back to your menu scene and out of any session. The pause menu's Leave button does the same. On the host, so does changing scene to your menu scene yourself.
If you joined someone else's server, there's no menu of yours to go back to - the game closes instead.
Game.IsOnMenu
True while your menu scene is the active scene. It's false once the game starts, and always false for a game without a menu scene.
Components in your menu scene and your game scenes don't need it, since they're only ever in one. It's for code that runs no matter which scene you're on:
GameObjectSystems, which are created in every scene, your menu included. See the lobby example.- Console commands, which can be typed on the menu
Things to watch for
You don't need a Quit button
Game.Close() is ignored while you're on your menu - the dock is how players leave.
Leave room for the dock
ScreenPanel already lays out around the dock. If you draw UI some other way, like with HudPainter, keep it inside Screen.SafeArea.