5 changes in this update
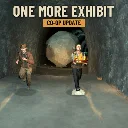
One More Exhibit
Released
Carefully dig up artifacts, outrun the boulder, and display your finds to attract visitors. Finders keepers, if you make it back
Changes
What's changed in One More Exhibit with each update.
Added
3 changes-
Press Escape for a menu: resume, the controls, favourite or review the game, and the developer's page. Playing alone, the game waits for you.
-
In co-op, press 1-4 to call out "Wait!", "Go!", "Take it!" or "Run!" to your partner, in the chat.
-
A card by the tunnel entrance lists the call-outs while you have company.
Improved
1 change-
Sending a friend home no longer locks them out: they can come straight back. Strangers you send home still stay out until you close the game.
Known Issues
1 change-
In the dig view the chat can sometimes sit over the Wall Integrity panel.
Added
3 changes-
A Help Wanted notice in the hall: press E there to invite a friend to your museum.
-
Open your museum to the public from the same notice so anyone can join, or make it friends only again. The host can send a guest home from there too.
-
Twelve new achievements: for co-op, the shop, rare finds, the survey stand, the Zephyr's glide, the Aegis, today's dig, sliding through a chase, tunnel finds and completing the museum.
Improved
2 changes-
Every exhibit now has its own themed stand to buy in the museum shop, not just the Seer's Eye and the Rosewood Casket.
-
The museum board now ranks every museum as it grows, not only finished ones. Win a round and you'll see where your museum stands.
Fixed
1 change-
A hitch while the final screen was up after completing a museum.
Known Issues
1 change-
Earlier finished-museum scores don't carry over to the new board. UPDATED SO THIS IS NO LONGER THE CASE, OLD SCORES REMAIN
Improved
2 changes-
Winning a piece you can carry into the tunnel now tells you so at the round's end, even while you're carrying another.
-
The Warden's Aegis hints more clearly at what it's for.
Fixed
1 change-
In co-op, a partner still in the tunnel when the piece goes on its plinth is only knocked down by the boulder now, not caught, and their tool no longer comes home damaged.
Added
4 changes-
Standing at a display cabinet now tells you what it shows and how many visitors that attracts.
-
Playing with a Steam friend, they can now buy from the museum shop, restore pieces and choose the round's dig too.
-
In co-op, each player can now take an artifact from its plinth into the tunnel.
-
A player joining a friend's museum for the first time (or after a day away) now gets the museum's introductions.
Improved
5 changes-
The round report is shorter: what came of the piece and one visitor figure, with the full breakdown under Details (Tab or click).
-
Your partner now sees the Surveyor's Scarab working on your back: the antennae rise and the warning mark shows over your head as danger nears.
-
Your partner now sees the Zephyr Idol's wings open when you glide.
-
A plinth's visitor count now says the new number straight after an upgrade or restoration, and that it arrives at the end of the round.
-
If you are caught while your partner is still running, you wait in the hall until the round ends instead of heading back into the tunnel.
Fixed
3 changes-
The plinth visitor count could differ between you and your partner after an upgrade.
-
A caught partner could be caught a second time as they reappeared in the hall.
-
Buying Head start no longer brings back the first-round "the wall is collapsing, RUN" warning.
Added
9 changes-
A wall integrity gauge in the dig view: the wall's picture cracks, crumbles and trembles as it gets closer to giving, from Stable to Failing.
-
Play with a friend: when you start the game, choose a public game anyone can join, friends only, or a private game you invite someone into.
-
Voice chat, using your s&box voice setting (push-to-talk is V).
-
Your partner's lantern burns teal, so you can tell whose light is whose from the far end of a tunnel, and their name shows over their head when you're close or they're talking.
-
A friend who joins comes in their own clothes.
-
Take the hit for the runner: if the boulder catches you while your partner is carrying the piece home, it slows as if it had smashed through a beam.
-
A co-op leaderboard page on the museum's board for museums finished together.
-
The museum says when a friend joins or leaves, and welcomes you when you join someone else's.
-
A microphone mark shows while your voice is going out.
Improved
3 changes-
If your partner leaves, the museum tells you, and anything they were holding goes back where it belongs.
-
Joining a friend's museum drops you straight in, without the introduction to a museum that isn't yours.
-
In a friend's museum, display cabinets, plinth enhancements and restorations are theirs to buy. Boosts are anyone's.
Fixed
1 change-
Loose rock in the tunnel ceiling could hang in mid-air under the roof after a new tunnel was built.
Known Issues
1 change-
A museum you finish after playing any round with a friend goes on the co-op board, not the solo one.
Added
7 changes-
A museum shop now stands by the tunnel arch, and opens once you have your first exhibit. Spend the kudos your visitors pay on upgrades for the museum, your plinths and yourself.
-
Five boosts, each for one round: Slider soles, Fleet foot, Steady hands, Head start and Lucky pockets. They cost more the deeper the museum digs.
-
The closing bell is now bought at the shop, and once bought it stays in every museum you open.
-
The boosts you bought are shown in the corner of the screen during the round, and light up when they help you. Slides kick up dust, running leaves wisps at your ankles, extra taps glint, and lucky finds flash gold as you pocket them.
-
Plinth enhancements: give a piece's plinth a finer stand, then gallery lighting, then a stand made for it, so it draws more visitors. The Seer's Eye and the Rosewood Casket have theirs; more are coming.
-
Rare finds: nine unique antiquities hide in the mounds, given away by a rainbow glint. Bring them home to keep, along with your first pottery shard, bead and coin.
-
Display cabinets: buy up to four and your kept finds fill them on their own, behind the plinths, for more visitors.
Improved
4 changes-
Tunnel finds lying on the floor glow and sparkle, so you can spot them on the run home.
-
Today's dig can be started from the Visitors board as well as from the bell.
-
After your first win, the museum shows you where your kudos go and where to spend them.
-
Coming back to a museum you saved before the shop arrived? You are shown the kudos box and the museum shop the first time you return.
Fixed
1 change-
The rockfall's hole in the roof no longer hangs below the rock as a floating slab.
Added
1 change-
From your third dig on, small finds hang in loose rock on the tunnel ceiling, out of reach on the way out. When the wall gives they shake loose onto the floor, landing just past a pendulum or on a collapsing floor. Run through one on the way home and it flies into your belt in a burst of sparks; it sells with the rest of your finds if you make it back. The boulder crushes any you leave behind.
Improved
4 changes-
New sounds: a find coming out of the dig, grabbing a find, lifting the piece out, being caught by the boulder, and the sheet rolling up off the tunnel mouth.
-
Menus, held choices and the museum's opening lines now make small interface sounds.
-
At the roped-off tunnel mouth, the survey stand beside you lights up and draws a line to itself, so you know where to choose your route.
-
With the Surveyor's Scarab home, the survey cards show it tracing each route. Taking a route closes the survey by itself.
Added
1 change-
From your third dig on, the tunnel is roped off until you choose your route. A survey stand by the arch offers two ways down to the same artifact, each with its own ground, and the rougher one pays 50% more kudos if you bring the artifact home. Bring home the Surveyor's Scarab and it maps both routes, showing what lies where before you choose. Press E at the stand, then hold 1 or 2 to take a route; the rope comes down for the one you pick.
Fixed
1 change-
The stretch of unstable ground in the tunnel now always lands in the same place for a given dig, and for every player in co-op.
Added
1 change-
From your second dig on, each dig can come with its own conditions: the artifact is buried off-centre, rich ground with more to find, a quiet tunnel with fewer hazards and pits, or a cracked wall that collapses sooner but pays 50% more kudos from visitors if you bring the artifact home. The round card explains it in chalk before you set off, the same mark is chalked on the stone of the tunnel arch until the dig is done (walk up to it for a reminder of what it means), and it sits in the corner while you dig.
Improved
2 changes-
Late rounds have been balanced: once the boulder is right behind you, a clean sprint holds it off. Before, from about the eighth piece on it was faster than you even up close, and only a beam, a door or the Aegis could save you.
-
The Surveyor's Scarab, the Zephyr Idol and the Warden's Aegis are each found one dig earlier, so every tool reaches you a round sooner. The Aegis now arrives just as the boulder starts to outpace you.
Added
1 change-
Once you have the Seer's Eye, it lights up the next exhibit's place on the collection board in its own gold. The place stays lit until you bring that piece home, then the light moves on to the next.
Improved
1 change-
A new museum's collection board now shows only the first exhibit's place. Every one after it is revealed by the Seer's Eye as you go.
Fixed
1 change-
You can no longer dig through the edge of the first dig site and see the boulder waiting behind the wall.
Added
5 changes-
An opening that says what the museum is for before you take control.
-
A second sequence after your first exhibit: the crowd it drew and why, that the artifacts that provide passive abilities can go back into the tunnel with you, and the bells purpose.
-
Tap E to step through either sequence; hold E to skip it.
-
An exclamation mark by the dig cursor when it is over the artifact itself.
-
A prompt pointing up the tunnel to the digging site once the pit is behind you.
Improved
7 changes-
The first two tunnels are shorter, growing to full length by the fourth round.
-
The first round is one pit and one beam, so jumping and sliding each get a moment of their own as a teaching step.
-
The museum starts with a single empty stand, and the next one arrives while the round card is up instead of appearing beside you.
-
Plinth plaques name the piece standing on them.
-
The collection board shows three shapes to find rather than all twelve.
-
The control prompts appear straight away, and each one now waits until you are near the thing it is about.
-
If you have not played for a day, the control prompts are offered once more.
Fixed
4 changes-
The dig camera crept closer while minor finds were still in the wall.
-
The dig footprint promised a wider hole than the tap actually made.
-
The jump prompt could be missed entirely by anyone quick, or retired for good by a single jump anywhere in the museum.
-
"bad ground ahead" was said at the tunnel mouth, several hazards before the bad ground.
Removed
1 change-
The bell reminder in the hall. The sequence after your first exhibit holds on the bell and says it better, once.
Added
2 changes-
The dig draws rings on the dirt showing exactly what the next tap will take away, how far it spreads and how deep it bites. Handfuls of dirt stack up three rings, stone gives one tight one, and ground with nothing left to give barely draws at all.
-
On your first dig, a brass surveyor's mark rings the spot worth starting at. It goes as soon as the piece shows, and you never see it again once you have taken one.
Improved
7 changes-
The dig tells you up front that the mouse is what aims your tool, and that the artifact has to be under your cursor before you can lift it or force it out.
-
Pulling an artifact free no longer walks you straight back out of the dig if you were already moving. The wall holds for a beat first, so you get to read that there is still something in there worth digging for.
-
The warning that the wall is coming down is a painted sign now rather than plain text. It tells you what has happened from the top of the screen, then drops to the bottom and points the way you need to run.
-
Every plinth tells you how many visitors its piece brings in, so you can walk the row and see which exhibits are carrying the museum and which are not worth what they cost to mend.
-
Plinth plaques name their exhibit, and the name is lettered onto the plaque as the piece is accessioned.
-
The prompt that sends you to a plinth says what to put on it.
-
Prompts name their key plainly now, and read as sentences rather than a string of clauses.
Added
1 change-
- The first time a dig wall gives way, it holds a moment longer and tells you what is happening and what to do about it. You only ever see it once, and it never costs you any ground.
Improved
5 changes-
- You now run by default, Shift now has the player walk. Until now you walked unless you held Shift, which meant a boulder you could not outrun unless you had guessed the key to run. (Sorry!)
-
- Shift is named in the opening controls, and again on the round the bad ground starts, where walking is an option to carefully navigate it.
-
- A collapsing wall looks like one: the cracks last as long as the collapse does, there are more of them, and the dust comes up through the floor at the foot of the wall instead of appearing in mid-air.
-
- The dust everywhere in the game is dust particles now rather than a placeholder.
-
- The prompt at the bell is no longer red. It opens a menu and commits you to nothing, so it reads like any other action prompt.
Added
8 changes-
- A collection board beside the tunnel entrance, in view the moment you spawn: twelve carved places, one for every piece the museum can hold, in the order you will dig them up. Each holds a carved symbol of its piece, cold until that piece is secured and warm once it is - on its plinth or out with you as a tool, both count.
-
- The four pieces that can be carried back down as tools carry a mark of their own, so you can see there is something more to them before you have found one.
-
- Museum leaderboards on a brass board in the hall, opposite the bell. Press E to read the whole thing: the top fifty, and your own place wherever it falls, scrolled with the mouse wheel.
-
- A finished museum now lands on a board. Your score is the visitors your museum drew divided by the rounds it took, so care pays and a lost round costs - it never rewards rushing.
-
- Today's dig: one seed a day, so everybody walks the same twelve corridors that day, with its own board for the day.
-
- Your best run of the day is the one that counts, so you can go again as often as you like.
-
- Press Tab while reading the board to move between all time and today's dig.
-
- Ring the bell and you are asked what you want, with what each choice costs: close the museum, or run today's dig. Hold the key rather than tapping it, and a museum is never closed without a second ask.
Improved
8 changes-
- The first thing you dig up is the Seer's Eye, and once it is on its plinth you can carry it back down the tunnel from round two. It shows you where the next piece is buried.
-
- Today's dig does not end your run. Your museum is set aside exactly as it stands and comes back when the dig is over, and you can walk back to the bell and return to it at any point between rounds.
-
- While you are running today's dig the entrance says so, and the hall tells you your own museum is waiting for you.
-
- The bell glows while it has something to offer, and a line in the hall says what it does the first few times you are near it. It can be rung in an empty hall now, so today's dig is there from your very first visit.
-
- The board on the hall wall shows today's dig while you are running it, and the all-time board the rest of the time.
-
- The end-of-round ledger tells you a piece is waiting on its plinth from the very first round, instead of two rounds later.
-
- The end-of-run plaque leads with your museum score, says how it was worked out, and tells you when it is your best yet.
-
- Getting knocked down by a pendulum, falling rock or a swinging rib costs you a second rather than a 1.25 seconds, so a mistake on the way home is less likely to end the run.
Known Issues
7 changes-
- If you resume a saved museum that holds only the Rosewood Casket, your next dig turns up a second one. Start a new run to clear it.
-
- A museum you started before this update will still finish, but it cannot be ranked. Currently the game has no way to know how long you had already been playing it. Start a new run for a place on the board.
-
- A run played with cheats enabled is never ranked.
-
- A finished run takes a few minutes to reach the board on the hall wall. The plaque at the end of your run shows your place straight away.
-
- The boards are empty until somebody finishes a full twelve-piece museum.
-
- Today's dig is one sitting. It keeps no progress of its own, so leaving part way through loses the dig - your museum is untouched either way.
-
- A run begun before midnight and finished after it counts on the all-time board but not on either day's board.
Added
7 changes-
- Kudos: your museum now earns kudos every round from the visitors it draws. The end-of-round screen shows them walking in and the kudos coming out as coins, and back in the hall you watch and hear them drop into the collection box by the tunnel entrance.
-
- Restoration: stand at a damaged exhibit and press R to spend kudos on repairing it. The prompt tells you its condition, what the repair brings it to and what it costs. A repaired piece draws more visitors from the end of that round, but it can only be brought to 75% - a perfect piece has to be dug out clean. A small gold coin appears over any exhibit you currently have the kudos to repair.
-
- Small finds in the dirt: a pottery shard near every exhibit, and glazed beads and old coins buried deeper. Dig one out and it goes in your pocket.
-
- Once the exhibit is dug clear, anything still buried glints in its own colour - terracotta, teal, gold. The rarer it is, the deeper it lies.
-
- A pocket in the corner of the dig view shows what this mound holds and what you have found.
-
- Get home alive and your pockets sell for kudos: on the end-of-round screen each find goes into the museum and comes out as coins. Get caught and you lose them.
-
- Taking the exhibit no longer brings the wall down at once. The wall holds a few seconds longer - longer the fewer taps you used - and every tap in that time is free. Dig fast for what is glinting, then run. Stepping back sets the boulder off straight away, and so does digging out the last find.
Improved
4 changes-
- The closing bell has moved onto the column to the left of the entrance, further from where you walk, so it cannot be rung by accident. Its prompt is now red, because ringing it ends your run.
-
- With one tool artifact in hand you can now take a different one straight off its plinth: the one you were holding goes back to its own plinth by itself, instead of the game telling you to return it first.
-
- The swinging beams on bad ground stand further apart in the later rounds, so a duck and a jump are two moves and not one.
-
- When the boulder wedges in the museum doorway the stone now shows it: dust bursts off both sides of the frame, chips skitter across the hall floor and powder sifts down from the lintel.
Fixed
4 changes-
- Running down the seam between two collapsing floor slabs only dropped one of them, and the other carried you across. Both go now.
-
- Getting knocked down by one of a pair of pendulums could stand you back up directly under the other one, which knocked you down again at once. You now always get up clear of every pendulum.
-
- The closing bell went dark and could not be rung while you were holding a tool artifact. It now stays lit and works.
-
- A sliding door or a fallen beam could, rarely, be built with its edge inside a stretch of bad ground.
Added
5 changes-
- Play as your own s&box avatar. A mannequin stands to the right of the tunnel entrance wearing your clothes. Press E to swap with it, and E again to put the caretaker's uniform back on. Your choice is remembered.
-
Improved:
-
- Crouching and sliding are now taught. As you enter the third round's tunnel, and the first few times you run up to something you have to get under, the game shows that C or Ctrl crouches and that holding it at a run slides.
-
- The tunnel now reminds you that holding right mouse looks around while you run out. It shows the first couple of times and stops once you have used it.
-
- The opening hint in the hall now shows the plain mouse for looking around.
Known Issues
1 change-
- Your avatar keeps the caretaker's build. Height is the same for everyone.
Added
20 changes-
- The museum has visitors. A crowd gathers behind velvet ropes on both sides of the hall, murmuring, and grows with your collection's fame, up to 38 people in nine looks. Soft dust drifts over the exhibits and the hall fades into darkness at its edges.
-
- Twelve one-of-a-kind artifacts to dig for, given up in a set order from the forgiving pieces to the ones that punish a careless swing: the Rosewood Casket, the Seer's Eye, the Sun Urn, the Surveyor's Scarab, the Coiled Jade Dragon, the Zephyr, the Celestial Egg, the Warden's Aegis, the Gilded Ammonite, the Regent's Crown, the Laughing King's Mask and the Oracle's Knot. Every piece draws its own crowd, the deepest showpieces most of all, and every piece shows its knocks: chip it in the dig and it comes home visibly cracked.
-
- The Warden's Aegis: wear it on your back and, once per round, it saves you from the boulder, shoving you clear in a burst of dust and knocking the boulder back. Its amber heart glows while the save is ready.
-
- The Surveyor's Scarab: carry it and it senses what is coming. Its antennae lift as the next danger nears, a mark over your head names it with a pictogram and fills as you close, and the piece on your back lights along its shell. It is the only thing that warns you about bad ground.
-
- Combination traps, from your third exhibit onward, one new arrangement with each exhibit after that, each set tight so the second trap lands where the first puts you down: a pendulum over a pit, a pendulum where the collapsing floor leaves you, two pendulums swinging out of step, rocks on a pit's take-off, a beam to crouch under the moment you land a jump, a rockfall beside a breakable floor whose rubble half blocks the way out of the pit, a pendulum swinging across a stone door's opening, a breakable floor right past a door, and a jump beam with a pit a stride after it.
-
- The fallen beam: a stone beam across the tunnel at chest height. You cannot run through it or jump it, so crouch under it. On the run home the boulder smashes through and barely breaks stride.
-
- The sliding stone door: carved slabs in a stone frame. Tap E beside a slab to slide it into its wall on the way in. On the run home tap E to pull a slab back across behind you. The boulder has to smash through, and shutting it buys you a moment.
-
- Bad ground, deep in the tunnels: straight stretches that have come down before, with broken props, spilled rock and someone's dropped lantern. Old beams lie flat along the wall in their posts and swing out across your path as you reach them. Duck the high ones, jump the low ones. The post's height is your only warning, and not every post still has a beam in it. Shallower rock gets a gentler version first, growing from one beam to three as your collection grows.
-
- Slide: press crouch while running to drop into a slide that carries your speed. You steer less while sliding, dust and grit kick up behind you, and a piece you are carrying goes out in your leading hand. C crouches as well as Ctrl.
-
- The rock changes as you go deeper. Bring three exhibits home and the tunnel turns to grey limestone under cooler light. Deeper still it is basalt: near-black, tight-fractured, with sparse teal mineral in the walls and the hazard lights turning cold against your warm lantern.
-
- Hazards on the way out now cost you. Take a hit before the dig and one of your lantern's four panes breaks, the flame gutters, and you walk on by less light. Something up the corridor answers every hit, and when you arrive the dig face shows the knocks you took: the wall gives up sooner.
-
- At the dig you hold your lantern up and it follows where you are digging.
-
- Your museum is saved between sessions. Close the game and come back to the same exhibits, scars, visitor count and round. Quitting during a round counts it as lost, along with anything you carried out.
-
- The closing bell beside the tunnel arch ends a run: ring it, ring it again, and the bell tolls, the hall hears what the run drew, the door shuts, and a new museum opens.
-
- An artifact you fail to bring home is not lost. The dig offers the same piece again next round in a fresh tunnel, at the condition you left it in, and the boulder that caught you takes its own share out of it. It never comes back worse than poor.
-
- The run ends when the last plinth is filled, not after a fixed twelve rounds, so losing a round costs you a round instead of the finish.
-
- The end-of-round summary finishes with what is ahead: the piece you dropped and whether it went down worse, the plinths still empty, and any tool waiting on its plinth.
-
- Eight achievements: your first find, a piece on display, one brought home pristine, a clean run home, one more round, a tool carried out, five plinths filled, and a crowd of 1,000.
-
- Hold the right mouse button on the way out to swing the camera around you. It settles back behind you when you let go.
-
- Sounds: gravel footsteps and a landing crunch in the tunnel, the pendulum's whoosh, a slab crumbling under your foot, harder rock impacts, the crowd's murmur, a scrape that travels with your slide, and a real door closing on the museum.
Improved
11 changes-
- The traps you meet are based on how many exhibits you have brought home, not how many rounds you have played, so a lost round is a second try at the same tunnel rather than a harder one.
-
- The tunnel keeps growing until the twelfth exhibit, the last rounds carry one more hazard, and the gaps you jump open a little wider with every exhibit on the wall.
-
- Late corridors carry the full set of hazards they were meant to.
-
- A tool you carried out and lost to the boulder comes home with you, damaged, instead of vanishing from the museum for good. The end-of-round summary says what it cost.
-
- Taking a tool down the tunnel costs exactly the crowd that piece was drawing, and the tools are spread across the collection so each arrives as the thing it answers starts to bite.
-
- The Seer's Eye shimmers with jade rings on your back while it reveals a buried piece, and the Zephyr's wings trail wind while you glide.
-
- Rockfall rocks are proper fractured stone.
-
- Two columns rise beside the museum arch into the dark, and the hall's back wall fades away instead of ending on a hard line.
-
- The circle under your feet stays on while you are on the ground, so you can see where you stand before you jump.
-
- Exhibit numbers follow the order pieces are found, with no gaps, and the summary plaque grows to fit a busy round.
-
- Crouching is twice as fast, and a collapsing floor gives way almost the moment you are on it: running across is no longer an answer, and a landing on one is a bounce at best.
Fixed
5 changes-
- A falling rock that landed on the boulder could shove it back up the tunnel. It breaks on the boulder now, like everything else in its way.
-
- The rounds number on the museum sign could go blank and flicker when it matched the exhibits number.
-
- Getting knocked down in a pit could stand you back up inside the floor.
-
- The pebbles rolling out of the cave mouth bumped you around the doorway. They pass through you now and scatter when you run over them.
-
- The opening hint promised a look control that was not there.
Removed
2 changes-
- The placeholder horse head, marble bust, jug, cat statue and pot are no longer found in the dig.
-
- The twelve-round limit.
Added
1 change-
- The boulder now smashes through the dig wall in a thick cloud of dust and flying rock, and the broken mouth stays behind with rubble on the floor.
Improved
2 changes-
- When the dig wall gives, it visibly cracks open across the mound before the boulder comes through.
-
- Bedrock in a dig hole is now dark slate, so the rock you cannot dig stands apart from the pale ground you still can.
Fixed
2 changes-
- Clicking the bottom of a dig hole right next to its wall digs the wall back instead of just knocking on rock.
-
- Ground beside a nearly-freed artifact no longer looks diggable when it has already been dug to the rock; the pale seam now only shows where there is still something to take.
Added
4 changes-
A second before each rock falls, a pale ring appears on the floor where it will land, with a puff of dust and a rattle from that spot. You no longer have to look up at the ceiling, or memorise the lanes, to get out of the way.
-
- A landing mark: while you are in the air, a dark disc on the ground shows exactly where your feet will come down. It sits on the lip as you jump a pit and drops out of sight while you are over the hole, so you can tell whether you will make it.
-
- The stretch of tunnel under a rockfall now has small stones lying on it and the ground is dented and broken where the rocks come down, so you can tell rocks fall there before the first one does.
-
- The floor under a pendulum is scraped where the stone swings, as wide as the stone itself, so the swing shows its history to the player before it moves.
Improved
1 change-
- The rockfall's warning comes a little earlier, a full second before the rock lands.
Added
6 changes-
- Your first dig is a smaller mound with the piece near the middle, and the old dig in it opens onto the pale seam. A line under the dig view tells you the seam means the artifact is close. Digs grow back to full size over your first few finds.
-
- Come home carrying a piece and the plinth it belongs on lights up, with a line saying to display it there.
-
- Step out of the dig and a prompt offers E to go straight back in. No need to walk away and come back.
-
- Dig near the buried piece and the chips sound and look warmer the closer you get. Dig into the core and it cracks and shakes, and the danger cue joins as the wall weakens.
-
- There is bedrock under every mound now. Reach it and a tap gives a dull knock and a cold spark instead of dirt: nothing here, dig elsewhere.
-
- Run a dig long and you can hear the boulder waking up behind the wall, well before it comes through.
Improved
4 changes-
- Losing a round no longer makes the next one harder. The boulder's speed, the tap budget and the tunnel's length grow with the exhibits you have brought back, not with the rounds you have played.
-
- Taking a piece out with you no longer drops the visitor and exhibit counts. They only fall if the piece is actually lost.
-
- The seam around a buried piece sparkles a little more often.
-
- The round ledger's button now reads "One more round".
Fixed
2 changes-
- Digging into the side of a hole now brings that wall down instead of nibbling its rim, so you can widen a pit toward the piece.
-
- On the way out, W and S now run along the tunnel where you stand instead of drifting with the camera round bends. The keys themselves are unchanged.
Removed
1 change-
- Nothing.
Known Issues
1 change-
- None noted, but please do let me know if anything issue is encountered!
Added
7 changes-
- The Seer's Eye, a jade eye in a bronze armillary, granting reveal when taken in.
-
- The Zephyr Idol, a winged idol who grants glides when taken in, and whose wings open when you leave the ground carrying it.
-
- Two more finds for the collection: the Surveyor's Scarab and the Gilded Sun Urn. They grant no power, but a well-kept one draws a good crowd.
-
- A round ledger. Between rounds the museum records what just happened: the piece you brought back and the condition it is in, what damaged it and by how much, anything you lost, and the visitors it drew. Read it at your own pace and press Continue when you are ready.
-
- The boulder carries a light ahead of it that turns orange and then red as it closes on you, and dies away as it reaches the doorway.
-
- The tunnel has dust and stone in it now: the dig wall cracks and sheds as it gives, the boulder comes through in a burst of dust and chips, kicks up dust as it rolls, throws a ring of it as it slams into the doorway, and the crumble raises a cloud over the rubble. The pendulum sheds dust as it sweeps, and the rockfall breathes dust from the ceiling before it drops.
-
- The hall has its lights: floor spotlights beside the entrance on the title, uplights along the walls, and a small lamp in front of every plinth label.
Improved
6 changes-
- The tunnel has a new look: mineral-veined rock walls with real relief under the lantern, a slate crown overhead, an earth floor worn low down the middle that swells and dips along its length, dust along the foot of the walls and pale mineral run-off down them.
-
- Running back from the boulder, your lantern now lights your face and the piece in your hands, so you can see what you are carrying while you run.
-
- Artifacts ride the harness large enough to see and face outward, so you can tell what you are carrying.
-
- Damaged pieces wear their damage as real breakage rather than generic cracks, so a battered one looks broken rather than dirty.
-
- The pendulum is a proper counterweight now: a belted stone on a hemp rope from a forged ceiling mount.
-
- The collapsing floor is laid in fractured flagstones instead of plain blocks.
Fixed
2 changes-
- The pendulum no longer swings through the tunnel walls. Its swing fits the corridor it hangs in, and it still reaches the wall at each end, so there is no safe lane past it.
-
- A plinth whose piece is replaced by another of the same kind now shows the new piece's wear, not the old one's.
Removed
2 changes-
- The horse head and the marble bust no longer grant abilities; they are ordinary finds.
-
- The low step near the tunnel mouth. It never asked anything of you, and the gap just past it still teaches the jump.
Known Issues
2 changes-
- Single-player only for the moment. Co-op is built and will follow once it has been properly tested.
-
- Crouch is bound but nothing needs it yet.
Added
2 changes-
- A floor beneath the world. If you ever end up under the level you are put back in the hall instead of falling forever.
-
- A way out of a wedge. Push against something with nowhere to go, or hang in mid-air, and you now work your way free instead of losing the run to it.
Improved
3 changes-
- The boulder throws you clear when it slams into the doorway, instead of leaving you to pick your way out of the debris.
-
- The dig names the artifact in every prompt, and the half-buried choice spells out that you can keep digging rather than forcing it.
-
- Losing a round without the artifact now tells you that is why.
Fixed
4 changes-
- Climbing the debris pile in the buried doorway could wedge you in it with no way out.
-
- Walking into the jammed boulder, after you had already outrun it, cost you the round.
-
- Timing the crumble let you sprint through the debris into the tunnel, which then counted you as trapped out there.
-
- Waiting near the doorway as the boulder landed could seal you on the wrong side of it.
Known Issues
2 changes-
- Single-player only for the moment. Co-op is built and will follow once it has been properly tested.
-
- Crouch is bound but nothing needs it yet.